Engineering Gameplay Guide
Transmission Undefined NoneContent
Engineering Gameplay Guide
A key pillar of Star Citizen’s vehicle gameplay loop is Engineering. It turns the moment-to-moment management of ships and vehicles into a focused effort to keep them operating at peak performance. It becomes especially important on larger vehicles with interiors, where full efficiency depends on multiple crew members working together to manage all essential systems. Engineering sits at the heart of managing a ship’s systems and resources in real time, while responding to critical failures across items and components, all with the goal of keeping the vehicle alive as long as possible.
It is a constant balancing act for any crew, relying on engineers to make vital decisions that preserve the full capabilities of their ship, protect lives, and keep them operating at their best out in the ‘verse.
Below is a starter guide to the developing Engineering gameplay, covering the fundamentals and introducing the key elements you will use along the way, helping you get ready to tackle any issue that may arise while navigating. If you are looking for support as you begin your journey into Engineering, visit the Guide System to connect with an experienced player ready to help.
Note: This post was released to coincide with Alpha 4.5, and will be updated when adjustments and changes are made to Engineering Gameplay.
WHAT IS ENGINEERING GAMEPLAY?
Engineering gameplay revolves around managing resources across your ships and vehicles through the Resource Network. This system forms the foundation of Engineering, allowing every item and system within a ship to communicate and rely on one another. The Engineering loop is how that management takes place, directing the flow of resources and keeping everything running as smoothly as possible.
Engineering affects all ships and vehicles, although the experience changes depending on size and crew. On a single seat fighter, most Engineering tasks are handled directly through MFDs, with pilots relying on preset flight profiles (which are SCM and NAV). On larger multi crew ships, the loop focuses heavily on extending the ship’s lifespan, with far more systems handled through a dedicated Engineering console and active coordination with the crew.
An engineer’s job is to monitor the ship, manage power distribution and system performance, and use every available tool to keep the vehicle flying. It is all about getting the most out of the Resource Network and the ship’s systems to operate at full capability.
This work takes shape in four key areas:
Preparation - Before departure, review your ship’s systems, extra parts, power levels, fuses, and anything else needed to stay flight ready. Always bring a Multitool with a Cambio Lite SRT attachment and a few full canisters for field repairs on components and hull.
Management - Distribute resources throughout the ship to achieve the operational profile you need. This can be adjusted in flight or swapped using presets.
Reaction - Address unexpected issues as they occur, including repairing, replacing, rerouting, or putting out fires with a fire extinguisher.
Maintenance - Plan ahead for eventual failures, store critical spares, and counter long term wear (coming in a later patch), so the ship can fly for as long as possible.
TOOLS
All engineers need to consider the following necessary tools to perform their tasks:
Cambio SRT Repair damaged components and damaged hull with the efficient two-handed Cambio SRT. Sed do eiusmod tempor incididunt ut labore et dolore magna aliqua. Amet consectetur adipiscing elit pellentesque habitant morbi tristique senectus. Nulla facilisi morbi tempus iaculis urna id volutpat lacus laoreet. Cambio-Lite Repair damaged components and damaged hull with the quick one-handed Cambio-Lite SRT. A Aurora LX transport emerged from the jump-point and lumbered toward the Launch deck We offer this Entity to the Timeline as a place to study and a place to meet RMC Canisters Recycled Material Composite can be purchased from specialized shops or filled manually by using the scrapping mode on your SRT tool, to strip hull materials from ships. They are used with Cambio tools. Nulla facilisi morbi tempus iaculis urna id volutpat lacus laoreet. Sed do eiusmod tempor incididunt ut labore et dolore magna aliqua. Amet consectetur adipiscing elit pellentesque habitant morbi tristique senectus. Fuses A handful of fuses in your backpack will make your job easier when replacing worn parts. Nicknamed Abyss due to its proximity to the Nebula, Yulin II looks like it's overseeCustoms agent the Pulsar Extinguishers Put out fires caused by malfunctions, overheated components or environmental failures. Replenish these by placing them back into their slots. Claimed entirely for military purposes, Hadrian II is home to the UPE and has the distinction of housUEE Colonial Command the largest population of Inforunners in the Empire Johnny waited a few moments before approachProcedural the Lift that Kray disappeared into ENGINEERING ITEMS
These are the elements found within vehicles that will support the Engineering gameplay loop:
Star_Citizen_Patch_4-5_Engineering_Guide_Banner_PS Star_Citizen_45_Patch_Relay_Image Star_Citizen_45_MFD_Power_Distribution_ZEUS_ScreenOnly Use_Console_Screen_Shot_03_Screen_Update Components
Core elements that drive the main functionality of major vehicle systems.
Relays
Link systems together and allow resources to travel through the ship. Relays come in various sizes.
MFD Power and Diagnostic
Provide a high level overview of power distribution and resource management.
Engineering Console
The beating heart of Engineering in most ships with interiors, giving crew the tools to review power flow, allocate resources, control systems, and understand the ship’s overall state.
WHAT ARE COMPONENTS?
Components provide the main functionality for all major vehicle systems; they are the core organs that keep the ship flying. Engineers and the crew must ensure that all components remain operational to keep the features of your ship active, so you can keep flying and performing at your maximum potential in your selected activity.
The core components for any ship include:
Power Plants - It is the beating heart of any ship, providing the essential power that keeps your components active.
Radars - Identify targets and signatures around your ship.
Coolers - Ensure all other components remain at operational temperatures.
Weapons - Various offensive components.
Utility Items - Specialized systems and components for certain ships such as salvaging or mining arms.
Shield Generators - Generate a shield protecting your ship against offensive weaponry.
Quantum Drives - Allow a ship to enable their Nav Mode and gain incredible speeds to enter Quantum.
Jump Module - Focused on allowing ships to navigate jump points. It is always linked to their Quantum Drive.
Life Support Generators - Maintain the life support systems throughout the ship: air, pressure and temperature.
They are the physicalized elements of Engineering gameplay and come with a range of variables to manage, including health and temperature values that must be monitored closely. These parts form the backbone of the ship, and you will need to operate, maintain, and repair them to keep everything functioning properly. Each one also has its own power demands that you will need to balance throughout different situations to stay effective.
Your vehicle’s components come in Sizes ranging from Size 0 up to Size 4, with Size 0 being the smallest and Size 4 the largest. Every vehicle has limitations on which sizes it can support and where they fit. All sizes can be earned or purchased from shops, but you can only replace Size 0 through Size 2 while in flight. Anything above Size 2 requires docking, although all sizes can still be repaired with the right tools. Weapon sizes extend up to Size 12.
Each component also has an Item Grade that reflects overall performance. Grades range from A, which represents the strongest performance, down to D, which is the least efficient but often the most affordable. You will eventually decide how and when to upgrade these grades to extend your ship’s life and maintain a competitive edge.
There is also a set of Classes for components, each offering different strengths and drawbacks depending on your approach. For example, Military-class components have higher durability and power output but demand more resources. Stealth parts focus on heat control and signature reduction to keep your ship hidden, but they wear down faster. This leaves you with meaningful choices based on your intended role. Will you head into combat and need tougher parts, race where output matters more than heat and wear, haul cargo where reliability is key, or even stay quiet with a stealth build? The decision is yours.
(The image below indicates our current balancing, and will continue to evolve with the ongoing development of Star Citizen.)
ENGINEERING RESOURCES
Engineering gameplay is the physical expression of the Resource Network and the management that surrounds it. As a result, there are several core resources that the crew must balance to maintain peak efficiency. These are controlled through MFDs, or through dedicated Engineering consoles on larger ships, that display more detailed information. These resources are the lifeblood of your vehicles and define performance. If any one of them is mismanaged, the impact will ripple across the ship. They are produced through systems throughout the vehicle and exist to bring the Resource Network to life in a hands on way.
Power is the most crucial resource to manage, directly affecting system performance. It is generated by the power plant and distributed through the Resource Network and fuses, allowing you to direct power to the systems that need it most.
Power is just one part of the equation. A crew must also manage several other vital resources to keep their ship operational:
Power - The resource that keeps every system running. If you lose it, the ship goes dark, and in critical failure states the risk of explosion rises sharply.
Coolant - The counterbalance to heavy system load, keeping temperatures under control and preventing components from overheating.
Life Support - Maintains breathable air, temperature, and pressure so the crew can continue operating throughout the ship.
Hydrogen Fuel - The lifeblood of the power plant, enabling power generation and forward thrust, and Power Plants will use fuel in a future patch.
Quantum Fuel - Required for quantum travel and long distance travel planning.
ResourceAndComponentFlow POWER DISTRIBUTION
Distributing power throughout your vehicle is one of the most important responsibilities for any engineer. This is handled through the Engineering console, or in a simplified form through your MFDs on single seat ships. On these smaller craft, power is displayed as segments or PIPs that you can assign to different systems. The console presents power as a universal resource across all ship systems, showing how much is available and how much each system can use up to its maximum. The more power you assign to a system, the stronger and more responsive it becomes, though many systems also require a minimum amount to operate at all.
Power distribution generally follows three performance ranges:
0 to 40 % - low output.
40 to 80 % - mid range.
80 to 100 % - high performance.
(The above percentage ranges are not absolute, and some items may have slightly different ranges.)
Where these levels fall affects system output, resource consumption, heat generation, wear over time, and may even lead to malfunctions. Your job is to balance the boost in performance against the long term costs to keep the ship running as long as possible.
Some systems are managed as groups known as pools, most commonly weapons, shields, and thrusters. A pool allows you to assign power to an entire group rather than managing each system individually. The size of each pool is determined on a per ship basis to match expected needs. One thing to pay close attention to is the weapon pool: Certain loadouts can exceed the pool capacity, meaning some weapons will never receive enough power to function and will appear greyed out. You will need to monitor and adapt to this when planning your build.
For new pilots, vehicle operator modes can automatically adjust broad power distributions based on what you are doing.
The two most common modes are SCM and NAV:
SCM - The default combat flight mode with power distributed across all primary systems, allowing normal flight, shields, and weapons.
NAV - Focused on traversal with power prioritized toward engines and thrusters, limiting most other systems.
Additional modes may exist on specialized ships, such as Salvage or Mining mode on industrial ships, depending on the intended role.
Use_Console_Screen_Shot_01_ScreenUpdate2 ENGINEERING CONSOLE
The Engineering console is the central hub for monitoring and controlling system performance across the ship. It is available on vehicles with interiors, usually near the engineering section.
The console is divided into three primary views:
Vehicle Holo / Rooms View (3D View)
Engineering View (Config)
Preset View
The Rooms View presents a 3D hologram of the ship’s interior layout, showing the status and location of systems and components. It offers a live readout of each room, including door states and the health and functionality of individual parts, with the ability to toggle them on or off. Key ship status details such as life support, cooling, overall health, and fuel are highlighted, along with any components that are offline or disabled so you never miss critical warnings.
The Engineering View focuses on power management and resource use throughout the ship: toggle systems, assign power values, and see real time resource production and consumption. This view also tracks temperature and provides warnings when components are overheating. Coolant acts as a passive resource produced automatically to regulate temperatures once powered, with its performance affected by component size, grade, and the power allocated.
Finally, the Preset View allows you to create and save custom power distribution profiles. You can build configurations from scratch, name them, and store them for use during key moments. Once saved, they are available for you and the crew to swap on demand.
Mastering the Engineering console gives engineers the ability to support their team effectively while others focus on flying, combat, or navigation.
Use_Console_Screen_Shot_02_ScreenUpdate COMPONENTS DETAILS
All components are linked through relays, allowing resources to move throughout your ship. Relays use fuse slots to regulate performance and come in three formats with 1, 2, or 3 slots. A relay will still function with a single working fuse, but missing or damaged fuses will reduce its efficiency affecting the available power in the vehicle. The more slots that are filled with working fuses, the better the relay will perform, so replacing damaged fuses should always be a priority.
Your Engineering console displays the overall health of each component so you can monitor their condition and react as needed. If a component becomes too damaged you may need to repair it, or replace it entirely if the damage is beyond recovery. Only components up to Size 2 can be replaced manually in-flight, while Size 3 and Size 4 require you to be in a hangar to perform a replacement through your mobiGlas.
Below, we will look at the challenges you will face and the reactions engineers must take to keep a ship flying.
Star_Citizen_Patch_45_fuse_box LIFE SUPPORT THROUGH THE SHIP
Engineers must ensure that Life Support is always active throughout the ship to maintain a breathable atmosphere. This system is responsible for balancing temperature, atmosphere, and pressure across the ship. It must always receive enough power to support the crew.
Life Support can be managed through the Engineering console using the Rooms View, which highlights critical information and allows you to control which rooms receive support. It displays flow rate, temperature, atmosphere levels, and any warnings so you have everything needed to make informed decisions. You can also control Life Support power through MFDs, with the ability to turn the system on or off, but with limited detail compared to the console view.
Filters are an upcoming feature currently in development, and planned to arrive after Alpha 4.5. Engineers will also need to replace Life Support filters to keep the system functioning. These filters are unique to the Life Support system and operate similarly to fuses, controlling resource output. Once a filter is full it must be replaced or the system will shut down.
Life Support can also become a strategic tool in emergencies, such as cooling rooms when components overheat or venting spaces to eliminate large fires before repressurizing. Venting a compartment removes it from use temporarily, but it is a swift and effective way to handle dangerous situations. You could even cut air to deal with hostile boarders who are foolish enough to enter without helmets!
ARMOR
In Alpha 4.5, ships gain Armor as an extra layer of defense. Armor reduces the impact of incoming fire and protects both the hull and internal components by limiting the damage and penetration that gets through. MFDs and Engineering consoles display remaining armor as a percentage, enabling crews to monitor the amount of protection remaining during a fight.
All weapon types and sizes can damage armor, though not all of them are equally good at it. Smaller weapons generally struggle to break through thick armor, while heavier fire can wear it down and eventually remove that protection, exposing the ship’s components to direct damage.
Energy and ballistic weapons interact with armor in different ways:
Energy weapons are more effective at reducing hull and armor material.
Ballistic weapons offer higher penetration to pass through armor and hit components, especially when fired from larger caliber weapons.
The amount of armor a ship carries depends on its size and role. Armor is always shown as a relative percentage of what remains, affecting how well a ship can resist damage to its vital systems. Military ships are built with more robust armor compared to civilian or industrial vessels, while lighter ships sacrifice protection for speed and maneuverability.
DAMAGE PENETRATION
Different weapon types perform better or worse against armor, creating opportunities to target internal systems more effectively. From an Engineering perspective, one of the most efficient ways to disable or destroy a ship is to breach its armor and damage components directly. In earlier updates, ships used a single health pool that covered the entire body, but that system has now evolved in preparation for Maelstrom, our future physicalized armor system. Ships are broken into individual components, and damage to those parts directly affects performance and survivability.
The more damage your components take, the less your ship can operate at full capacity. Severely damaged or destroyed systems increase the likelihood of a natural disabled state, or a "soft death," giving you and your crew a chance to finish the fight with precision fire. A heavily damaged power plant also carries a chance of triggering a critical malfunction that could result in an explosion. However, if a ship's hull is brought to 0 health, a buffer is activated. If more damage is delivered on top of that dead hull buffer, it will trigger a "hard death" and explode the ship.
Damage penetration lets you push through a ship’s hull and hit internal components directly, maximizing the impact of your shots. Weapon size and the size of the ships involved both play a role in how effective this can be. Components can also be interrupted by distortion weapons, which temporarily shut them down and reduce their output to zero.
Ballistic weapons offer higher penetration, letting you breach a ship more effectively once the armor health is reduced, allowing accurate damage to internal components (even a chance to bypass shields).
Energy weapons are more effective against shields and bringing armor health down.
Explosives are mainly designed to destroy external components and damage armor.
Distortion weapons affect nearby components at the point of impact.
WEAR AND TEAR (Full System Coming Soon)
Over time, if components are not properly maintained, they will suffer wear and tear that reduces their effectiveness. This degradation increases resource consumption, raises heat output, and heightens the chance of malfunctions. It is essential to maintain components to keep them operating correctly.
As components continue running, wear will build up, leading to damage that directly affects their performance. The more wear they accumulate, the less efficient they become, eventually reaching a point where they fail and take on damage rapidly. If left unchecked, this can threaten the ship’s ability to operate.
To prevent this, you must monitor component status and repair or replace them when needed, whether during flight or once safely docked. Keeping the ship healthy is an ongoing responsibility and a key part of keeping your crew in the fight.
HEAT AND FIRE
Heat is now a crucial element for pilots and engineers to monitor. As components operate, they generate heat and raise their temperature, creating a constant balancing act between cooling systems and maintaining performance. Coolant must be directed appropriately to keep components within safe operating limits while still supporting the needs of the ship.
The longer a component runs at high temperatures, the faster it will accumulate wear, reducing efficiency and increasing the chance of failure. If a component overheats beyond safe thresholds, it will trigger a thermal shutdown and stop functioning until it cools down.
However, letting shield generators get to the point of malfunction, or surfaces getting too hot, increases the risk of fire: one of the most dangerous situations a ship can face. Fires can start due to malfunctions, or direct damage. Engineers must respond quickly using fire extinguishers or by venting a room to remove oxygen and suppress flames.
Staying on top of heat management is essential to keeping your ship safe and operational.
MALFUNCTIONS
Components that are damaged, worn, or running too hot can begin to malfunction, and the results can range from reduced performance, to complete shutdowns.
They may be triggered by taking additional damage, failing to activate when needed, or requiring immediate repair. In the worst cases, they can ignite fires that cause long lasting harm and threaten the ship.
Engineers must stay vigilant and take care of their systems by avoiding overuse or overpowering, keeping heat under control, and maintaining components in good condition. Proactive care is the key to preventing malfunctions before they escalate.
CRITICAL FAILURE
Critical failures are catastrophic states that may cause your entire vehicle to explode. They can occur when a critical part of your hull takes significant damage after reaching zero health, or your power plant is destroyed.
Once you experience a critical failure, there remains a window of opportunity to act. allowing you to stabilize the situation.
For components, you can repair, remove or externally eject them before destruction, and when your ship's hull is brought to zero health, there is still time to repair the vehicle itself before the worst occurs, but should damage continue being delivered beyond zero health and without necessary action, a "hard death" may be triggered that ultimately causes the ship to explode.
REPAIRING
Repair gameplay is essential to extending the life of all components and your vehicle as a whole. It is recommended you always have a repair tool available for all situations, and monitor the health of all your components via an engineering screen. It is crucial especially when you are in active combat on larger ships and pushing your vessel to it's maximum output, to have some of your crew focused on investigating the battle damage and managing whatever is needed, repairing and even fighting fires in extreme cases. In single-seater ships, you can perform limited auto-repairs via MFD screens to ensure you can get back to safe harbor for completed full repairs.
To be able to repair with the Cambio SRT or a Multitool with a Cambio-Lite SRT attachment, you will need RMC (Recycled Material Composite). These can either be bought in canisters at port to utilize to repair. You only have a limited amount of RMC in each canister and when you run out, need to either buy more or salvage more (review our Salvage guide here to see more on this). This is vital to ensure you can do necessary repairs but it will also take some
The key is catching issues early and deciding whether a component needs repair by monitoring its health. You can restore components that are completely destroyed back to a functional state while in flight, but you won’t be able to bring them back to full health. To reach 100 percent, they need to be serviced or replaced at a station. If a component is destroyed again after being repaired in flight, it cannot be repaired on the ship a second time and will stay inoperable until you dock. You can carry spare components onboard if you have space, but only size 1 and size 2 components can be swapped while in flight. Anything larger requires you to be in a hangar to replace.
Overall, ensuring you have a capable engineering team that can repair quickly and efficiently, always monitoring the components will set you and your crew above the rest.
Star_Citizen_Patch_45_repair_4k_crop ENGINEERING AVAILABILITY IN ALL VEHICLES
As of Alpha 4.8, every single vehicle in Star Citizen is Engineering-enabled and capable of the baseline experience. While many have the full loop available to them, others remain in ongoing stages of development.
Below is a list of all currently flyable ships and vehicles and their Engineering status for Alpha 4.8. Please remember this list will change with each subsequent patch.
We are tremendously excited by the potential this system has for the future of Star Citizen gameplay, and as each ship continues it's journey to the final stage of implementation, so too will Engineering itself continue to evolve and develop over the next year.
We encourage you to try the experience in multiple ships, and to provide feedback on this new gameplay system through our various communications channels and help us continue to make Engineering as fun and rewarding as possible.
Stage 3 - Fully Enabled All Physicalized Components are Accessible
Full Item Repair Enabled via Physical Access, Engineering Screen or MFDs (Depending on Vehicle Size and Interior)
All Relays are Accessible
Alpha 4.8:
Aegis Gladius
Aegis Gladius Pirate
Aegis Gladius Valiant
Aegis Hammerhead
Aegis Idris-M
Aegis Idris-P
Aegis Retaliator
Aegis Sabre
Aegis Sabre Comet
Aegis Sabre Firebird
Aegis Sabre Peregrine
Aegis Sabre Raven
Aegis Tiburon
Aegis Vanguard Harbinger
Aegis Vanguard Hoplite
Aegis Vanguard Sentinel
Aegis Vanguard Warden
Anvil Asgard
Anvil Carrack
Anvil Paladin
Anvil Terrapin
Anvil Terrapin Medic
Argo CSV-SM
Argo MOLE
Argo MOTH
Argo MPUV-1T
Argo RAFT
Argo SRV
Aopoa San'tok.yai
CNOU Hoverquad
CNOU Nomad
Crusader Ares Inferno
Crusader Ares Ion
Crusader Intrepid
Crusader Mercury Star Runner
Crusader Spirit A1
Crusader Spirit C1
Crusader Starlifter A2
Crusader Starlifter C2
Crusader Starlifter M2
Drake Clipper
Drake Corsair
Drake Cutter
Drake Cutter Rambler
Drake Cutter Scout
Drake Golem
Drake Golem OX
Drake Ironclad
Drake Ironclad Assault
Drake Pitbull
Drake Vulture
Esperia Prowler
Esperia Prowler Utility
Esperia Talon
Esperia Talon Shrike
Gatac Syulen
Greycat MDC
Greycat MTC
Greycat STV
Greycat UTV
Kruger L-21 Wolf
Kruger L-22 Alpha Wolf
MISC Fortune
MISC Freelancer
MISC Freelancer DUR
MISC Freelancer MAX
MISC Freelancer MIS
MISC Hull B
MISC Starlancer MAX
MISC Starlancer TAC
MSIC Starlite
Mirai Fury
Mirai Fury LX
Mirai Fury MX
Mirai Guardian
Mirai Guardian MX
Mirai Guardian QI
Mirai Pulse
Mirai Pulse LX
Origin M80
Origin X1
Origin X1 Force
Origin X1 Velocity
RSI Apollo Medivac
RSI Apollo Triage
RSI Aurora Mk I CL
RSI Aurora Mk I ES
RSI Aurora Mk I LN
RSI Aurora Mk I LX
RSI Aurora Mk I MR
RSI Aurora Mk I SE
RSI Aurora Mk II
RSI Hermes
RSI Lynx
RSI Mantis
RSI Meteor
RSI Perseus
RSI Polaris
RSI Salvation
RSI Scorpius
RSI Scorpius Antares
RSI Ursa Medivac
RSI Zeus CL
RSI Zeus ES
Tumbril Nova
Tumbril Storm
Tumbril Storm AA
Stage 2 - Partial Functionality Some Physicalized Components are Accessible, but Not Potentially Not All
Some Item Repair Enabled via Physical Access, Engineering Screen or MFDs (Depending on Vehicle Size and Interior)
Some Relays are Accessible Depending on Vehicle
Alpha 4.8:
Aegis Reclaimer
Aegis Redeemer
Anvil Centurion
Anvil Spartan
Anvil Valkyrie
Anvil Valkyrie Liberator
Drake Caterpillar
Drake Cutlass Black
Drake Cutlass Blue
Drake Cutlass Red
Drake Cutlass Steel
Esperia Stinger
Grey's Market Shiv
MISC Hull-A
MISC Hull-C
MISC Starfarer
MISC Starfarer Gemini
Origin 100i
Origin 125a
Origin 135c
Origin 400i
Origin 600i Explorer
Origin 600i Touring
Origin 890J
RSI Constellation Andromeda
RSI Constellation Aquila
RSI Constellation Phoenix
RSI Constellation Taurus
Stage 1 - Basic Support No Physicalized Components are Accessible
Item Repair Enabled Only via MFDs
No Relays are Accessible
Alpha 4.8:
Aegis Avenger Stalker
Aegis Avenger Titan
Aegis Avenger Warlock
Aegis Eclipse
Anvil Arrow
Anvil Ballista
Anvil Gladiator
Anvil Hawk
Anvil Hornet F7A Mk1
Anvil Hornet F7A Mk2
Anvil Hornet F7C Mk1
Anvil Hornet F7C Mk2
Anvil Hornet F7C Wildfire Mk1
Anvil Hornet F7CM Mk1
Anvil Hornet F7CM Mk2
Anvil Hornet F7CR Mk1
Anvil Hornet F7CR Mk2
Anvil Hornet F7CS Mk1
Anvil Hornet F7CS Mk2
Anvil Hurricane
Anvil Lightning F8C
Anvil Pisces C8/C8X
Anvil Pisces C8R
Aopoa Khartu-Al
Aopoa Nox
Argo MPUV-1C
Argo MPUV-1P
Banu Defender
CNOU Mustang Alpha
CNOU Mustang Alpha Vindicator
CNOU Mustang Beta
CNOU Mustang Delta
CNOU Mustang Gamma
CNOU Mustang Omega
Drake Buccaneer
Drake Dragonfly
Drake Herald
Esperia Blade
Esperia Glaive
Greycat PTV
Greycat ROC
Greycat ROC-DS
Kruger Archimedes
Kruger Merlin
MISC Prospector
MISC Razor
MISC Razor EX
MISC Razor LX
MISC Relian Sen
MISC Reliant Kore
MISC Reliant Mako
MISC Reliant Tana
Origin 300i
Origin 315p
Origin 325a
Origin 350r
Origin 85X
Origin M50
RSI Ursa
Tumbril Cyclone
Tumbril Cyclone AA
Tumbril Cyclone MT
Tumbril Cyclone RC
Tumbril Cyclone RN
Tumbril Cyclone TR
Vanduul Scythe
Was ist das?
Werkzeuge
Ressourcen
Konsole
Rüstung
Reparieren
Schiffsstufen
Engineering Gameplay Guide
A key pillar of Star Citizen’s vehicle gameplay loop is Engineering. It turns the moment-to-moment management of ships and vehicles into a focused effort to keep them operating at peak performance. It becomes especially important on larger vehicles with interiors, where full efficiency depends on multiple crew members working together to manage all essential systems. Engineering sits at the heart of managing a ship’s systems and resources in real time, while responding to critical failures across items and components, all with the goal of keeping the vehicle alive as long as possible.
It is a constant balancing act for any crew, relying on engineers to make vital decisions that preserve the full capabilities of their ship, protect lives, and keep them operating at their best out in the ‘verse.
Below is a starter guide to the developing Engineering gameplay, covering the fundamentals and introducing the key elements you will use along the way, helping you get ready to tackle any issue that may arise while navigating. If you are looking for support as you begin your journey into Engineering, visit the Guide System to connect with an experienced player ready to help.
Note: This post was released to coincide with Alpha 4.5, and will be updated when adjustments and changes are made to Engineering Gameplay.
WHAT IS ENGINEERING GAMEPLAY?
Engineering gameplay revolves around managing resources across your ships and vehicles through the Resource Network. This system forms the foundation of Engineering, allowing every item and system within a ship to communicate and rely on one another. The Engineering loop is how that management takes place, directing the flow of resources and keeping everything running as smoothly as possible.
Engineering affects all ships and vehicles, although the experience changes depending on size and crew. On a single seat fighter, most Engineering tasks are handled directly through MFDs, with pilots relying on preset flight profiles (which are SCM and NAV). On larger multi crew ships, the loop focuses heavily on extending the ship’s lifespan, with far more systems handled through a dedicated Engineering console and active coordination with the crew.
An engineer’s job is to monitor the ship, manage power distribution and system performance, and use every available tool to keep the vehicle flying. It is all about getting the most out of the Resource Network and the ship’s systems to operate at full capability.
This work takes shape in four key areas:
Preparation - Before departure, review your ship’s systems, extra parts, power levels, fuses, and anything else needed to stay flight ready. Always bring a Multitool with a Cambio Lite SRT attachment and a few full canisters for field repairs on components and hull.
Management - Distribute resources throughout the ship to achieve the operational profile you need. This can be adjusted in flight or swapped using presets.
Reaction - Address unexpected issues as they occur, including repairing, replacing, rerouting, or putting out fires with a fire extinguisher.
Maintenance - Plan ahead for eventual failures, store critical spares, and counter long term wear (coming in a later patch), so the ship can fly for as long as possible.
TOOLS
All engineers need to consider the following necessary tools to perform their tasks:
Cambio SRT Repair damaged components and damaged hull with the efficient two-handed Cambio SRT. Sed do eiusmod tempor incididunt ut labore et dolore magna aliqua. Amet consectetur adipiscing elit pellentesque habitant morbi tristique senectus. Nulla facilisi morbi tempus iaculis urna id volutpat lacus laoreet. Cambio-Lite Repair damaged components and damaged hull with the quick one-handed Cambio-Lite SRT. A Aurora LX transport emerged from the jump-point and lumbered toward the Launch deck We offer this Entity to the Timeline as a place to study and a place to meet RMC Canisters Recycled Material Composite can be purchased from specialized shops or filled manually by using the scrapping mode on your SRT tool, to strip hull materials from ships. They are used with Cambio tools. Nulla facilisi morbi tempus iaculis urna id volutpat lacus laoreet. Sed do eiusmod tempor incididunt ut labore et dolore magna aliqua. Amet consectetur adipiscing elit pellentesque habitant morbi tristique senectus. Fuses A handful of fuses in your backpack will make your job easier when replacing worn parts. Nicknamed Abyss due to its proximity to the Nebula, Yulin II looks like it's overseeCustoms agent the Pulsar Extinguishers Put out fires caused by malfunctions, overheated components or environmental failures. Replenish these by placing them back into their slots. Claimed entirely for military purposes, Hadrian II is home to the UPE and has the distinction of housUEE Colonial Command the largest population of Inforunners in the Empire Johnny waited a few moments before approachProcedural the Lift that Kray disappeared into ENGINEERING ITEMS
These are the elements found within vehicles that will support the Engineering gameplay loop:
Star_Citizen_Patch_4-5_Engineering_Guide_Banner_PS Star_Citizen_45_Patch_Relay_Image Star_Citizen_45_MFD_Power_Distribution_ZEUS_ScreenOnly Use_Console_Screen_Shot_03_Screen_Update Components
Core elements that drive the main functionality of major vehicle systems.
Relays
Link systems together and allow resources to travel through the ship. Relays come in various sizes.
MFD Power and Diagnostic
Provide a high level overview of power distribution and resource management.
Engineering Console
The beating heart of Engineering in most ships with interiors, giving crew the tools to review power flow, allocate resources, control systems, and understand the ship’s overall state.
WHAT ARE COMPONENTS?
Components provide the main functionality for all major vehicle systems; they are the core organs that keep the ship flying. Engineers and the crew must ensure that all components remain operational to keep the features of your ship active, so you can keep flying and performing at your maximum potential in your selected activity.
The core components for any ship include:
Power Plants - It is the beating heart of any ship, providing the essential power that keeps your components active.
Radars - Identify targets and signatures around your ship.
Coolers - Ensure all other components remain at operational temperatures.
Weapons - Various offensive components.
Utility Items - Specialized systems and components for certain ships such as salvaging or mining arms.
Shield Generators - Generate a shield protecting your ship against offensive weaponry.
Quantum Drives - Allow a ship to enable their Nav Mode and gain incredible speeds to enter Quantum.
Jump Module - Focused on allowing ships to navigate jump points. It is always linked to their Quantum Drive.
Life Support Generators - Maintain the life support systems throughout the ship: air, pressure and temperature.
They are the physicalized elements of Engineering gameplay and come with a range of variables to manage, including health and temperature values that must be monitored closely. These parts form the backbone of the ship, and you will need to operate, maintain, and repair them to keep everything functioning properly. Each one also has its own power demands that you will need to balance throughout different situations to stay effective.
Your vehicle’s components come in Sizes ranging from Size 0 up to Size 4, with Size 0 being the smallest and Size 4 the largest. Every vehicle has limitations on which sizes it can support and where they fit. All sizes can be earned or purchased from shops, but you can only replace Size 0 through Size 2 while in flight. Anything above Size 2 requires docking, although all sizes can still be repaired with the right tools. Weapon sizes extend up to Size 12.
Each component also has an Item Grade that reflects overall performance. Grades range from A, which represents the strongest performance, down to D, which is the least efficient but often the most affordable. You will eventually decide how and when to upgrade these grades to extend your ship’s life and maintain a competitive edge.
There is also a set of Classes for components, each offering different strengths and drawbacks depending on your approach. For example, Military-class components have higher durability and power output but demand more resources. Stealth parts focus on heat control and signature reduction to keep your ship hidden, but they wear down faster. This leaves you with meaningful choices based on your intended role. Will you head into combat and need tougher parts, race where output matters more than heat and wear, haul cargo where reliability is key, or even stay quiet with a stealth build? The decision is yours.
(The image below indicates our current balancing, and will continue to evolve with the ongoing development of Star Citizen.)
ENGINEERING RESOURCES
Engineering gameplay is the physical expression of the Resource Network and the management that surrounds it. As a result, there are several core resources that the crew must balance to maintain peak efficiency. These are controlled through MFDs, or through dedicated Engineering consoles on larger ships, that display more detailed information. These resources are the lifeblood of your vehicles and define performance. If any one of them is mismanaged, the impact will ripple across the ship. They are produced through systems throughout the vehicle and exist to bring the Resource Network to life in a hands on way.
Power is the most crucial resource to manage, directly affecting system performance. It is generated by the power plant and distributed through the Resource Network and fuses, allowing you to direct power to the systems that need it most.
Power is just one part of the equation. A crew must also manage several other vital resources to keep their ship operational:
Power - The resource that keeps every system running. If you lose it, the ship goes dark, and in critical failure states the risk of explosion rises sharply.
Coolant - The counterbalance to heavy system load, keeping temperatures under control and preventing components from overheating.
Life Support - Maintains breathable air, temperature, and pressure so the crew can continue operating throughout the ship.
Hydrogen Fuel - The lifeblood of the power plant, enabling power generation and forward thrust, and Power Plants will use fuel in a future patch.
Quantum Fuel - Required for quantum travel and long distance travel planning.
ResourceAndComponentFlow POWER DISTRIBUTION
Distributing power throughout your vehicle is one of the most important responsibilities for any engineer. This is handled through the Engineering console, or in a simplified form through your MFDs on single seat ships. On these smaller craft, power is displayed as segments or PIPs that you can assign to different systems. The console presents power as a universal resource across all ship systems, showing how much is available and how much each system can use up to its maximum. The more power you assign to a system, the stronger and more responsive it becomes, though many systems also require a minimum amount to operate at all.
Power distribution generally follows three performance ranges:
0 to 40 % - low output.
40 to 80 % - mid range.
80 to 100 % - high performance.
(The above percentage ranges are not absolute, and some items may have slightly different ranges.)
Where these levels fall affects system output, resource consumption, heat generation, wear over time, and may even lead to malfunctions. Your job is to balance the boost in performance against the long term costs to keep the ship running as long as possible.
Some systems are managed as groups known as pools, most commonly weapons, shields, and thrusters. A pool allows you to assign power to an entire group rather than managing each system individually. The size of each pool is determined on a per ship basis to match expected needs. One thing to pay close attention to is the weapon pool: Certain loadouts can exceed the pool capacity, meaning some weapons will never receive enough power to function and will appear greyed out. You will need to monitor and adapt to this when planning your build.
For new pilots, vehicle operator modes can automatically adjust broad power distributions based on what you are doing.
The two most common modes are SCM and NAV:
SCM - The default combat flight mode with power distributed across all primary systems, allowing normal flight, shields, and weapons.
NAV - Focused on traversal with power prioritized toward engines and thrusters, limiting most other systems.
Additional modes may exist on specialized ships, such as Salvage or Mining mode on industrial ships, depending on the intended role.
Use_Console_Screen_Shot_01_ScreenUpdate2 ENGINEERING CONSOLE
The Engineering console is the central hub for monitoring and controlling system performance across the ship. It is available on vehicles with interiors, usually near the engineering section.
The console is divided into three primary views:
Vehicle Holo / Rooms View (3D View)
Engineering View (Config)
Preset View
The Rooms View presents a 3D hologram of the ship’s interior layout, showing the status and location of systems and components. It offers a live readout of each room, including door states and the health and functionality of individual parts, with the ability to toggle them on or off. Key ship status details such as life support, cooling, overall health, and fuel are highlighted, along with any components that are offline or disabled so you never miss critical warnings.
The Engineering View focuses on power management and resource use throughout the ship: toggle systems, assign power values, and see real time resource production and consumption. This view also tracks temperature and provides warnings when components are overheating. Coolant acts as a passive resource produced automatically to regulate temperatures once powered, with its performance affected by component size, grade, and the power allocated.
Finally, the Preset View allows you to create and save custom power distribution profiles. You can build configurations from scratch, name them, and store them for use during key moments. Once saved, they are available for you and the crew to swap on demand.
Mastering the Engineering console gives engineers the ability to support their team effectively while others focus on flying, combat, or navigation.
Use_Console_Screen_Shot_02_ScreenUpdate COMPONENTS DETAILS
All components are linked through relays, allowing resources to move throughout your ship. Relays use fuse slots to regulate performance and come in three formats with 1, 2, or 3 slots. A relay will still function with a single working fuse, but missing or damaged fuses will reduce its efficiency affecting the available power in the vehicle. The more slots that are filled with working fuses, the better the relay will perform, so replacing damaged fuses should always be a priority.
Your Engineering console displays the overall health of each component so you can monitor their condition and react as needed. If a component becomes too damaged you may need to repair it, or replace it entirely if the damage is beyond recovery. Only components up to Size 2 can be replaced manually in-flight, while Size 3 and Size 4 require you to be in a hangar to perform a replacement through your mobiGlas.
Below, we will look at the challenges you will face and the reactions engineers must take to keep a ship flying.
Star_Citizen_Patch_45_fuse_box LIFE SUPPORT THROUGH THE SHIP
Engineers must ensure that Life Support is always active throughout the ship to maintain a breathable atmosphere. This system is responsible for balancing temperature, atmosphere, and pressure across the ship. It must always receive enough power to support the crew.
Life Support can be managed through the Engineering console using the Rooms View, which highlights critical information and allows you to control which rooms receive support. It displays flow rate, temperature, atmosphere levels, and any warnings so you have everything needed to make informed decisions. You can also control Life Support power through MFDs, with the ability to turn the system on or off, but with limited detail compared to the console view.
Filters are an upcoming feature currently in development, and planned to arrive after Alpha 4.5. Engineers will also need to replace Life Support filters to keep the system functioning. These filters are unique to the Life Support system and operate similarly to fuses, controlling resource output. Once a filter is full it must be replaced or the system will shut down.
Life Support can also become a strategic tool in emergencies, such as cooling rooms when components overheat or venting spaces to eliminate large fires before repressurizing. Venting a compartment removes it from use temporarily, but it is a swift and effective way to handle dangerous situations. You could even cut air to deal with hostile boarders who are foolish enough to enter without helmets!
ARMOR
In Alpha 4.5, ships gain Armor as an extra layer of defense. Armor reduces the impact of incoming fire and protects both the hull and internal components by limiting the damage and penetration that gets through. MFDs and Engineering consoles display remaining armor as a percentage, enabling crews to monitor the amount of protection remaining during a fight.
All weapon types and sizes can damage armor, though not all of them are equally good at it. Smaller weapons generally struggle to break through thick armor, while heavier fire can wear it down and eventually remove that protection, exposing the ship’s components to direct damage.
Energy and ballistic weapons interact with armor in different ways:
Energy weapons are more effective at reducing hull and armor material.
Ballistic weapons offer higher penetration to pass through armor and hit components, especially when fired from larger caliber weapons.
The amount of armor a ship carries depends on its size and role. Armor is always shown as a relative percentage of what remains, affecting how well a ship can resist damage to its vital systems. Military ships are built with more robust armor compared to civilian or industrial vessels, while lighter ships sacrifice protection for speed and maneuverability.
DAMAGE PENETRATION
Different weapon types perform better or worse against armor, creating opportunities to target internal systems more effectively. From an Engineering perspective, one of the most efficient ways to disable or destroy a ship is to breach its armor and damage components directly. In earlier updates, ships used a single health pool that covered the entire body, but that system has now evolved in preparation for Maelstrom, our future physicalized armor system. Ships are broken into individual components, and damage to those parts directly affects performance and survivability.
The more damage your components take, the less your ship can operate at full capacity. Severely damaged or destroyed systems increase the likelihood of a natural disabled state, or a "soft death," giving you and your crew a chance to finish the fight with precision fire. A heavily damaged power plant also carries a chance of triggering a critical malfunction that could result in an explosion. However, if a ship's hull is brought to 0 health, a buffer is activated. If more damage is delivered on top of that dead hull buffer, it will trigger a "hard death" and explode the ship.
Damage penetration lets you push through a ship’s hull and hit internal components directly, maximizing the impact of your shots. Weapon size and the size of the ships involved both play a role in how effective this can be. Components can also be interrupted by distortion weapons, which temporarily shut them down and reduce their output to zero.
Ballistic weapons offer higher penetration, letting you breach a ship more effectively once the armor health is reduced, allowing accurate damage to internal components (even a chance to bypass shields).
Energy weapons are more effective against shields and bringing armor health down.
Explosives are mainly designed to destroy external components and damage armor.
Distortion weapons affect nearby components at the point of impact.
WEAR AND TEAR (Full System Coming Soon)
Over time, if components are not properly maintained, they will suffer wear and tear that reduces their effectiveness. This degradation increases resource consumption, raises heat output, and heightens the chance of malfunctions. It is essential to maintain components to keep them operating correctly.
As components continue running, wear will build up, leading to damage that directly affects their performance. The more wear they accumulate, the less efficient they become, eventually reaching a point where they fail and take on damage rapidly. If left unchecked, this can threaten the ship’s ability to operate.
To prevent this, you must monitor component status and repair or replace them when needed, whether during flight or once safely docked. Keeping the ship healthy is an ongoing responsibility and a key part of keeping your crew in the fight.
HEAT AND FIRE
Heat is now a crucial element for pilots and engineers to monitor. As components operate, they generate heat and raise their temperature, creating a constant balancing act between cooling systems and maintaining performance. Coolant must be directed appropriately to keep components within safe operating limits while still supporting the needs of the ship.
The longer a component runs at high temperatures, the faster it will accumulate wear, reducing efficiency and increasing the chance of failure. If a component overheats beyond safe thresholds, it will trigger a thermal shutdown and stop functioning until it cools down.
However, letting shield generators get to the point of malfunction, or surfaces getting too hot, increases the risk of fire: one of the most dangerous situations a ship can face. Fires can start due to malfunctions, or direct damage. Engineers must respond quickly using fire extinguishers or by venting a room to remove oxygen and suppress flames.
Staying on top of heat management is essential to keeping your ship safe and operational.
MALFUNCTIONS
Components that are damaged, worn, or running too hot can begin to malfunction, and the results can range from reduced performance, to complete shutdowns.
They may be triggered by taking additional damage, failing to activate when needed, or requiring immediate repair. In the worst cases, they can ignite fires that cause long lasting harm and threaten the ship.
Engineers must stay vigilant and take care of their systems by avoiding overuse or overpowering, keeping heat under control, and maintaining components in good condition. Proactive care is the key to preventing malfunctions before they escalate.
CRITICAL FAILURE
Critical failures are catastrophic states that may cause your entire vehicle to explode. They can occur when a critical part of your hull takes significant damage after reaching zero health, or your power plant is destroyed.
Once you experience a critical failure, there remains a window of opportunity to act. allowing you to stabilize the situation.
For components, you can repair, remove or externally eject them before destruction, and when your ship's hull is brought to zero health, there is still time to repair the vehicle itself before the worst occurs, but should damage continue being delivered beyond zero health and without necessary action, a "hard death" may be triggered that ultimately causes the ship to explode.
REPAIRING
Repair gameplay is essential to extending the life of all components and your vehicle as a whole. It is recommended you always have a repair tool available for all situations, and monitor the health of all your components via an engineering screen. It is crucial especially when you are in active combat on larger ships and pushing your vessel to it's maximum output, to have some of your crew focused on investigating the battle damage and managing whatever is needed, repairing and even fighting fires in extreme cases. In single-seater ships, you can perform limited auto-repairs via MFD screens to ensure you can get back to safe harbor for completed full repairs.
To be able to repair with the Cambio SRT or a Multitool with a Cambio-Lite SRT attachment, you will need RMC (Recycled Material Composite). These can either be bought in canisters at port to utilize to repair. You only have a limited amount of RMC in each canister and when you run out, need to either buy more or salvage more (review our Salvage guide here to see more on this). This is vital to ensure you can do necessary repairs but it will also take some
The key is catching issues early and deciding whether a component needs repair by monitoring its health. You can restore components that are completely destroyed back to a functional state while in flight, but you won’t be able to bring them back to full health. To reach 100 percent, they need to be serviced or replaced at a station. If a component is destroyed again after being repaired in flight, it cannot be repaired on the ship a second time and will stay inoperable until you dock. You can carry spare components onboard if you have space, but only size 1 and size 2 components can be swapped while in flight. Anything larger requires you to be in a hangar to replace.
Overall, ensuring you have a capable engineering team that can repair quickly and efficiently, always monitoring the components will set you and your crew above the rest.
Star_Citizen_Patch_45_repair_4k_crop ENGINEERING AVAILABILITY IN ALL VEHICLES
As of Alpha 4.8, every single vehicle in Star Citizen is Engineering-enabled and capable of the baseline experience. While many have the full loop available to them, others remain in ongoing stages of development.
Below is a list of all currently flyable ships and vehicles and their Engineering status for Alpha 4.8. Please remember this list will change with each subsequent patch.
We are tremendously excited by the potential this system has for the future of Star Citizen gameplay, and as each ship continues it's journey to the final stage of implementation, so too will Engineering itself continue to evolve and develop over the next year.
We encourage you to try the experience in multiple ships, and to provide feedback on this new gameplay system through our various communications channels and help us continue to make Engineering as fun and rewarding as possible.
Stage 3 - Fully Enabled All Physicalized Components are Accessible
Full Item Repair Enabled via Physical Access, Engineering Screen or MFDs (Depending on Vehicle Size and Interior)
All Relays are Accessible
Alpha 4.8:
Aegis Gladius
Aegis Gladius Pirate
Aegis Gladius Valiant
Aegis Hammerhead
Aegis Idris-M
Aegis Idris-P
Aegis Retaliator
Aegis Sabre
Aegis Sabre Comet
Aegis Sabre Firebird
Aegis Sabre Peregrine
Aegis Sabre Raven
Aegis Tiburon
Aegis Vanguard Harbinger
Aegis Vanguard Hoplite
Aegis Vanguard Sentinel
Aegis Vanguard Warden
Anvil Asgard
Anvil Carrack
Anvil Paladin
Anvil Terrapin
Anvil Terrapin Medic
Argo CSV-SM
Argo MOLE
Argo MOTH
Argo MPUV-1T
Argo RAFT
Argo SRV
Aopoa San'tok.yai
CNOU Hoverquad
CNOU Nomad
Crusader Ares Inferno
Crusader Ares Ion
Crusader Intrepid
Crusader Mercury Star Runner
Crusader Spirit A1
Crusader Spirit C1
Crusader Starlifter A2
Crusader Starlifter C2
Crusader Starlifter M2
Drake Clipper
Drake Corsair
Drake Cutter
Drake Cutter Rambler
Drake Cutter Scout
Drake Golem
Drake Golem OX
Drake Ironclad
Drake Ironclad Assault
Drake Pitbull
Drake Vulture
Esperia Prowler
Esperia Prowler Utility
Esperia Talon
Esperia Talon Shrike
Gatac Syulen
Greycat MDC
Greycat MTC
Greycat STV
Greycat UTV
Kruger L-21 Wolf
Kruger L-22 Alpha Wolf
MISC Fortune
MISC Freelancer
MISC Freelancer DUR
MISC Freelancer MAX
MISC Freelancer MIS
MISC Hull B
MISC Starlancer MAX
MISC Starlancer TAC
MSIC Starlite
Mirai Fury
Mirai Fury LX
Mirai Fury MX
Mirai Guardian
Mirai Guardian MX
Mirai Guardian QI
Mirai Pulse
Mirai Pulse LX
Origin M80
Origin X1
Origin X1 Force
Origin X1 Velocity
RSI Apollo Medivac
RSI Apollo Triage
RSI Aurora Mk I CL
RSI Aurora Mk I ES
RSI Aurora Mk I LN
RSI Aurora Mk I LX
RSI Aurora Mk I MR
RSI Aurora Mk I SE
RSI Aurora Mk II
RSI Hermes
RSI Lynx
RSI Mantis
RSI Meteor
RSI Perseus
RSI Polaris
RSI Salvation
RSI Scorpius
RSI Scorpius Antares
RSI Ursa Medivac
RSI Zeus CL
RSI Zeus ES
Tumbril Nova
Tumbril Storm
Tumbril Storm AA
Stage 2 - Partial Functionality Some Physicalized Components are Accessible, but Not Potentially Not All
Some Item Repair Enabled via Physical Access, Engineering Screen or MFDs (Depending on Vehicle Size and Interior)
Some Relays are Accessible Depending on Vehicle
Alpha 4.8:
Aegis Reclaimer
Aegis Redeemer
Anvil Centurion
Anvil Spartan
Anvil Valkyrie
Anvil Valkyrie Liberator
Drake Caterpillar
Drake Cutlass Black
Drake Cutlass Blue
Drake Cutlass Red
Drake Cutlass Steel
Esperia Stinger
Grey's Market Shiv
MISC Hull-A
MISC Hull-C
MISC Starfarer
MISC Starfarer Gemini
Origin 100i
Origin 125a
Origin 135c
Origin 400i
Origin 600i Explorer
Origin 600i Touring
Origin 890J
RSI Constellation Andromeda
RSI Constellation Aquila
RSI Constellation Phoenix
RSI Constellation Taurus
Stage 1 - Basic Support No Physicalized Components are Accessible
Item Repair Enabled Only via MFDs
No Relays are Accessible
Alpha 4.8:
Aegis Avenger Stalker
Aegis Avenger Titan
Aegis Avenger Warlock
Aegis Eclipse
Anvil Arrow
Anvil Ballista
Anvil Gladiator
Anvil Hawk
Anvil Hornet F7A Mk1
Anvil Hornet F7A Mk2
Anvil Hornet F7C Mk1
Anvil Hornet F7C Mk2
Anvil Hornet F7C Wildfire Mk1
Anvil Hornet F7CM Mk1
Anvil Hornet F7CM Mk2
Anvil Hornet F7CR Mk1
Anvil Hornet F7CR Mk2
Anvil Hornet F7CS Mk1
Anvil Hornet F7CS Mk2
Anvil Hurricane
Anvil Lightning F8C
Anvil Pisces C8/C8X
Anvil Pisces C8R
Aopoa Khartu-Al
Aopoa Nox
Argo MPUV-1C
Argo MPUV-1P
Banu Defender
CNOU Mustang Alpha
CNOU Mustang Alpha Vindicator
CNOU Mustang Beta
CNOU Mustang Delta
CNOU Mustang Gamma
CNOU Mustang Omega
Drake Buccaneer
Drake Dragonfly
Drake Herald
Esperia Blade
Esperia Glaive
Greycat PTV
Greycat ROC
Greycat ROC-DS
Kruger Archimedes
Kruger Merlin
MISC Prospector
MISC Razor
MISC Razor EX
MISC Razor LX
MISC Relian Sen
MISC Reliant Kore
MISC Reliant Mako
MISC Reliant Tana
Origin 300i
Origin 315p
Origin 325a
Origin 350r
Origin 85X
Origin M50
RSI Ursa
Tumbril Cyclone
Tumbril Cyclone AA
Tumbril Cyclone MT
Tumbril Cyclone RC
Tumbril Cyclone RN
Tumbril Cyclone TR
Vanduul Scythe
Engineering Gameplay Guide
A key pillar of Star Citizen’s vehicle gameplay loop is Engineering. It turns the moment-to-moment management of ships and vehicles into a focused effort to keep them operating at peak performance. It becomes especially important on larger vehicles with interiors, where full efficiency depends on multiple crew members working together to manage all essential systems. Engineering sits at the heart of managing a ship’s systems and resources in real time, while responding to critical failures across items and components, all with the goal of keeping the vehicle alive as long as possible.
It is a constant balancing act for any crew, relying on engineers to make vital decisions that preserve the full capabilities of their ship, protect lives, and keep them operating at their best out in the ‘verse.
Below is a starter guide to the developing Engineering gameplay, covering the fundamentals and introducing the key elements you will use along the way, helping you get ready to tackle any issue that may arise while navigating. If you are looking for support as you begin your journey into Engineering, visit the Guide System to connect with an experienced player ready to help.
Note: This post was released to coincide with Alpha 4.5, and will be updated when adjustments and changes are made to Engineering Gameplay.
WHAT IS ENGINEERING GAMEPLAY?
Engineering gameplay revolves around managing resources across your ships and vehicles through the Resource Network. This system forms the foundation of Engineering, allowing every item and system within a ship to communicate and rely on one another. The Engineering loop is how that management takes place, directing the flow of resources and keeping everything running as smoothly as possible.
Engineering affects all ships and vehicles, although the experience changes depending on size and crew. On a single seat fighter, most Engineering tasks are handled directly through MFDs, with pilots relying on preset flight profiles (which are SCM and NAV). On larger multi crew ships, the loop focuses heavily on extending the ship’s lifespan, with far more systems handled through a dedicated Engineering console and active coordination with the crew.
An engineer’s job is to monitor the ship, manage power distribution and system performance, and use every available tool to keep the vehicle flying. It is all about getting the most out of the Resource Network and the ship’s systems to operate at full capability.
This work takes shape in four key areas:
Preparation - Before departure, review your ship’s systems, extra parts, power levels, fuses, and anything else needed to stay flight ready. Always bring a Multitool with a Cambio Lite SRT attachment and a few full canisters for field repairs on components and hull.
Management - Distribute resources throughout the ship to achieve the operational profile you need. This can be adjusted in flight or swapped using presets.
Reaction - Address unexpected issues as they occur, including repairing, replacing, rerouting, or putting out fires with a fire extinguisher.
Maintenance - Plan ahead for eventual failures, store critical spares, and counter long term wear (coming in a later patch), so the ship can fly for as long as possible.
TOOLS
All engineers need to consider the following necessary tools to perform their tasks:
Cambio SRT Repair damaged components and damaged hull with the efficient two-handed Cambio SRT. Sed do eiusmod tempor incididunt ut labore et dolore magna aliqua. Amet consectetur adipiscing elit pellentesque habitant morbi tristique senectus. Nulla facilisi morbi tempus iaculis urna id volutpat lacus laoreet. Cambio-Lite Repair damaged components and damaged hull with the quick one-handed Cambio-Lite SRT. A Aurora LX transport emerged from the jump-point and lumbered toward the Launch deck We offer this Entity to the Timeline as a place to study and a place to meet RMC Canisters Recycled Material Composite can be purchased from specialized shops or filled manually by using the scrapping mode on your SRT tool, to strip hull materials from ships. They are used with Cambio tools. Nulla facilisi morbi tempus iaculis urna id volutpat lacus laoreet. Sed do eiusmod tempor incididunt ut labore et dolore magna aliqua. Amet consectetur adipiscing elit pellentesque habitant morbi tristique senectus. Fuses A handful of fuses in your backpack will make your job easier when replacing worn parts. Nicknamed Abyss due to its proximity to the Nebula, Yulin II looks like it's overseeCustoms agent the Pulsar Extinguishers Put out fires caused by malfunctions, overheated components or environmental failures. Replenish these by placing them back into their slots. Claimed entirely for military purposes, Hadrian II is home to the UPE and has the distinction of housUEE Colonial Command the largest population of Inforunners in the Empire Johnny waited a few moments before approachProcedural the Lift that Kray disappeared into ENGINEERING ITEMS
These are the elements found within vehicles that will support the Engineering gameplay loop:
Star_Citizen_Patch_4-5_Engineering_Guide_Banner_PS Star_Citizen_45_Patch_Relay_Image Star_Citizen_45_MFD_Power_Distribution_ZEUS_ScreenOnly Use_Console_Screen_Shot_03_Screen_Update Components
Core elements that drive the main functionality of major vehicle systems.
Relays
Link systems together and allow resources to travel through the ship. Relays come in various sizes.
MFD Power and Diagnostic
Provide a high level overview of power distribution and resource management.
Engineering Console
The beating heart of Engineering in most ships with interiors, giving crew the tools to review power flow, allocate resources, control systems, and understand the ship’s overall state.
WHAT ARE COMPONENTS?
Components provide the main functionality for all major vehicle systems; they are the core organs that keep the ship flying. Engineers and the crew must ensure that all components remain operational to keep the features of your ship active, so you can keep flying and performing at your maximum potential in your selected activity.
The core components for any ship include:
Power Plants - It is the beating heart of any ship, providing the essential power that keeps your components active.
Radars - Identify targets and signatures around your ship.
Coolers - Ensure all other components remain at operational temperatures.
Weapons - Various offensive components.
Utility Items - Specialized systems and components for certain ships such as salvaging or mining arms.
Shield Generators - Generate a shield protecting your ship against offensive weaponry.
Quantum Drives - Allow a ship to enable their Nav Mode and gain incredible speeds to enter Quantum.
Jump Module - Focused on allowing ships to navigate jump points. It is always linked to their Quantum Drive.
Life Support Generators - Maintain the life support systems throughout the ship: air, pressure and temperature.
They are the physicalized elements of Engineering gameplay and come with a range of variables to manage, including health and temperature values that must be monitored closely. These parts form the backbone of the ship, and you will need to operate, maintain, and repair them to keep everything functioning properly. Each one also has its own power demands that you will need to balance throughout different situations to stay effective.
Your vehicle’s components come in Sizes ranging from Size 0 up to Size 4, with Size 0 being the smallest and Size 4 the largest. Every vehicle has limitations on which sizes it can support and where they fit. All sizes can be earned or purchased from shops, but you can only replace Size 0 through Size 2 while in flight. Anything above Size 2 requires docking, although all sizes can still be repaired with the right tools. Weapon sizes extend up to Size 12.
Each component also has an Item Grade that reflects overall performance. Grades range from A, which represents the strongest performance, down to D, which is the least efficient but often the most affordable. You will eventually decide how and when to upgrade these grades to extend your ship’s life and maintain a competitive edge.
There is also a set of Classes for components, each offering different strengths and drawbacks depending on your approach. For example, Military-class components have higher durability and power output but demand more resources. Stealth parts focus on heat control and signature reduction to keep your ship hidden, but they wear down faster. This leaves you with meaningful choices based on your intended role. Will you head into combat and need tougher parts, race where output matters more than heat and wear, haul cargo where reliability is key, or even stay quiet with a stealth build? The decision is yours.
(The image below indicates our current balancing, and will continue to evolve with the ongoing development of Star Citizen.)
ENGINEERING RESOURCES
Engineering gameplay is the physical expression of the Resource Network and the management that surrounds it. As a result, there are several core resources that the crew must balance to maintain peak efficiency. These are controlled through MFDs, or through dedicated Engineering consoles on larger ships, that display more detailed information. These resources are the lifeblood of your vehicles and define performance. If any one of them is mismanaged, the impact will ripple across the ship. They are produced through systems throughout the vehicle and exist to bring the Resource Network to life in a hands on way.
Power is the most crucial resource to manage, directly affecting system performance. It is generated by the power plant and distributed through the Resource Network and fuses, allowing you to direct power to the systems that need it most.
Power is just one part of the equation. A crew must also manage several other vital resources to keep their ship operational:
Power - The resource that keeps every system running. If you lose it, the ship goes dark, and in critical failure states the risk of explosion rises sharply.
Coolant - The counterbalance to heavy system load, keeping temperatures under control and preventing components from overheating.
Life Support - Maintains breathable air, temperature, and pressure so the crew can continue operating throughout the ship.
Hydrogen Fuel - The lifeblood of the power plant, enabling power generation and forward thrust, and Power Plants will use fuel in a future patch.
Quantum Fuel - Required for quantum travel and long distance travel planning.
ResourceAndComponentFlow POWER DISTRIBUTION
Distributing power throughout your vehicle is one of the most important responsibilities for any engineer. This is handled through the Engineering console, or in a simplified form through your MFDs on single seat ships. On these smaller craft, power is displayed as segments or PIPs that you can assign to different systems. The console presents power as a universal resource across all ship systems, showing how much is available and how much each system can use up to its maximum. The more power you assign to a system, the stronger and more responsive it becomes, though many systems also require a minimum amount to operate at all.
Power distribution generally follows three performance ranges:
0 to 40 % - low output.
40 to 80 % - mid range.
80 to 100 % - high performance.
(The above percentage ranges are not absolute, and some items may have slightly different ranges.)
Where these levels fall affects system output, resource consumption, heat generation, wear over time, and may even lead to malfunctions. Your job is to balance the boost in performance against the long term costs to keep the ship running as long as possible.
Some systems are managed as groups known as pools, most commonly weapons, shields, and thrusters. A pool allows you to assign power to an entire group rather than managing each system individually. The size of each pool is determined on a per ship basis to match expected needs. One thing to pay close attention to is the weapon pool: Certain loadouts can exceed the pool capacity, meaning some weapons will never receive enough power to function and will appear greyed out. You will need to monitor and adapt to this when planning your build.
For new pilots, vehicle operator modes can automatically adjust broad power distributions based on what you are doing.
The two most common modes are SCM and NAV:
SCM - The default combat flight mode with power distributed across all primary systems, allowing normal flight, shields, and weapons.
NAV - Focused on traversal with power prioritized toward engines and thrusters, limiting most other systems.
Additional modes may exist on specialized ships, such as Salvage or Mining mode on industrial ships, depending on the intended role.
Use_Console_Screen_Shot_01_ScreenUpdate2 ENGINEERING CONSOLE
The Engineering console is the central hub for monitoring and controlling system performance across the ship. It is available on vehicles with interiors, usually near the engineering section.
The console is divided into three primary views:
Vehicle Holo / Rooms View (3D View)
Engineering View (Config)
Preset View
The Rooms View presents a 3D hologram of the ship’s interior layout, showing the status and location of systems and components. It offers a live readout of each room, including door states and the health and functionality of individual parts, with the ability to toggle them on or off. Key ship status details such as life support, cooling, overall health, and fuel are highlighted, along with any components that are offline or disabled so you never miss critical warnings.
The Engineering View focuses on power management and resource use throughout the ship: toggle systems, assign power values, and see real time resource production and consumption. This view also tracks temperature and provides warnings when components are overheating. Coolant acts as a passive resource produced automatically to regulate temperatures once powered, with its performance affected by component size, grade, and the power allocated.
Finally, the Preset View allows you to create and save custom power distribution profiles. You can build configurations from scratch, name them, and store them for use during key moments. Once saved, they are available for you and the crew to swap on demand.
Mastering the Engineering console gives engineers the ability to support their team effectively while others focus on flying, combat, or navigation.
Use_Console_Screen_Shot_02_ScreenUpdate COMPONENTS DETAILS
All components are linked through relays, allowing resources to move throughout your ship. Relays use fuse slots to regulate performance and come in three formats with 1, 2, or 3 slots. A relay will still function with a single working fuse, but missing or damaged fuses will reduce its efficiency affecting the available power in the vehicle. The more slots that are filled with working fuses, the better the relay will perform, so replacing damaged fuses should always be a priority.
Your Engineering console displays the overall health of each component so you can monitor their condition and react as needed. If a component becomes too damaged you may need to repair it, or replace it entirely if the damage is beyond recovery. Only components up to Size 2 can be replaced manually in-flight, while Size 3 and Size 4 require you to be in a hangar to perform a replacement through your mobiGlas.
Below, we will look at the challenges you will face and the reactions engineers must take to keep a ship flying.
Star_Citizen_Patch_45_fuse_box LIFE SUPPORT THROUGH THE SHIP
Engineers must ensure that Life Support is always active throughout the ship to maintain a breathable atmosphere. This system is responsible for balancing temperature, atmosphere, and pressure across the ship. It must always receive enough power to support the crew.
Life Support can be managed through the Engineering console using the Rooms View, which highlights critical information and allows you to control which rooms receive support. It displays flow rate, temperature, atmosphere levels, and any warnings so you have everything needed to make informed decisions. You can also control Life Support power through MFDs, with the ability to turn the system on or off, but with limited detail compared to the console view.
Filters are an upcoming feature currently in development, and planned to arrive after Alpha 4.5. Engineers will also need to replace Life Support filters to keep the system functioning. These filters are unique to the Life Support system and operate similarly to fuses, controlling resource output. Once a filter is full it must be replaced or the system will shut down.
Life Support can also become a strategic tool in emergencies, such as cooling rooms when components overheat or venting spaces to eliminate large fires before repressurizing. Venting a compartment removes it from use temporarily, but it is a swift and effective way to handle dangerous situations. You could even cut air to deal with hostile boarders who are foolish enough to enter without helmets!
ARMOR
In Alpha 4.5, ships gain Armor as an extra layer of defense. Armor reduces the impact of incoming fire and protects both the hull and internal components by limiting the damage and penetration that gets through. MFDs and Engineering consoles display remaining armor as a percentage, enabling crews to monitor the amount of protection remaining during a fight.
All weapon types and sizes can damage armor, though not all of them are equally good at it. Smaller weapons generally struggle to break through thick armor, while heavier fire can wear it down and eventually remove that protection, exposing the ship’s components to direct damage.
Energy and ballistic weapons interact with armor in different ways:
Energy weapons are more effective at reducing hull and armor material.
Ballistic weapons offer higher penetration to pass through armor and hit components, especially when fired from larger caliber weapons.
The amount of armor a ship carries depends on its size and role. Armor is always shown as a relative percentage of what remains, affecting how well a ship can resist damage to its vital systems. Military ships are built with more robust armor compared to civilian or industrial vessels, while lighter ships sacrifice protection for speed and maneuverability.
DAMAGE PENETRATION
Different weapon types perform better or worse against armor, creating opportunities to target internal systems more effectively. From an Engineering perspective, one of the most efficient ways to disable or destroy a ship is to breach its armor and damage components directly. In earlier updates, ships used a single health pool that covered the entire body, but that system has now evolved in preparation for Maelstrom, our future physicalized armor system. Ships are broken into individual components, and damage to those parts directly affects performance and survivability.
The more damage your components take, the less your ship can operate at full capacity. Severely damaged or destroyed systems increase the likelihood of a natural disabled state, or a "soft death," giving you and your crew a chance to finish the fight with precision fire. A heavily damaged power plant also carries a chance of triggering a critical malfunction that could result in an explosion. However, if a ship's hull is brought to 0 health, a buffer is activated. If more damage is delivered on top of that dead hull buffer, it will trigger a "hard death" and explode the ship.
Damage penetration lets you push through a ship’s hull and hit internal components directly, maximizing the impact of your shots. Weapon size and the size of the ships involved both play a role in how effective this can be. Components can also be interrupted by distortion weapons, which temporarily shut them down and reduce their output to zero.
Ballistic weapons offer higher penetration, letting you breach a ship more effectively once the armor health is reduced, allowing accurate damage to internal components (even a chance to bypass shields).
Energy weapons are more effective against shields and bringing armor health down.
Explosives are mainly designed to destroy external components and damage armor.
Distortion weapons affect nearby components at the point of impact.
WEAR AND TEAR (Full System Coming Soon)
Over time, if components are not properly maintained, they will suffer wear and tear that reduces their effectiveness. This degradation increases resource consumption, raises heat output, and heightens the chance of malfunctions. It is essential to maintain components to keep them operating correctly.
As components continue running, wear will build up, leading to damage that directly affects their performance. The more wear they accumulate, the less efficient they become, eventually reaching a point where they fail and take on damage rapidly. If left unchecked, this can threaten the ship’s ability to operate.
To prevent this, you must monitor component status and repair or replace them when needed, whether during flight or once safely docked. Keeping the ship healthy is an ongoing responsibility and a key part of keeping your crew in the fight.
HEAT AND FIRE
Heat is now a crucial element for pilots and engineers to monitor. As components operate, they generate heat and raise their temperature, creating a constant balancing act between cooling systems and maintaining performance. Coolant must be directed appropriately to keep components within safe operating limits while still supporting the needs of the ship.
The longer a component runs at high temperatures, the faster it will accumulate wear, reducing efficiency and increasing the chance of failure. If a component overheats beyond safe thresholds, it will trigger a thermal shutdown and stop functioning until it cools down.
However, letting shield generators get to the point of malfunction, or surfaces getting too hot, increases the risk of fire: one of the most dangerous situations a ship can face. Fires can start due to malfunctions, or direct damage. Engineers must respond quickly using fire extinguishers or by venting a room to remove oxygen and suppress flames.
Staying on top of heat management is essential to keeping your ship safe and operational.
MALFUNCTIONS
Components that are damaged, worn, or running too hot can begin to malfunction, and the results can range from reduced performance, to complete shutdowns.
They may be triggered by taking additional damage, failing to activate when needed, or requiring immediate repair. In the worst cases, they can ignite fires that cause long lasting harm and threaten the ship.
Engineers must stay vigilant and take care of their systems by avoiding overuse or overpowering, keeping heat under control, and maintaining components in good condition. Proactive care is the key to preventing malfunctions before they escalate.
CRITICAL FAILURE
Critical failures are catastrophic states that may cause your entire vehicle to explode. They can occur when a critical part of your hull takes significant damage after reaching zero health, or your power plant is destroyed.
Once you experience a critical failure, there remains a window of opportunity to act. allowing you to stabilize the situation.
For components, you can repair, remove or externally eject them before destruction, and when your ship's hull is brought to zero health, there is still time to repair the vehicle itself before the worst occurs, but should damage continue being delivered beyond zero health and without necessary action, a "hard death" may be triggered that ultimately causes the ship to explode.
REPAIRING
Repair gameplay is essential to extending the life of all components and your vehicle as a whole. It is recommended you always have a repair tool available for all situations, and monitor the health of all your components via an engineering screen. It is crucial especially when you are in active combat on larger ships and pushing your vessel to it's maximum output, to have some of your crew focused on investigating the battle damage and managing whatever is needed, repairing and even fighting fires in extreme cases. In single-seater ships, you can perform limited auto-repairs via MFD screens to ensure you can get back to safe harbor for completed full repairs.
To be able to repair with the Cambio SRT or a Multitool with a Cambio-Lite SRT attachment, you will need RMC (Recycled Material Composite). These can either be bought in canisters at port to utilize to repair. You only have a limited amount of RMC in each canister and when you run out, need to either buy more or salvage more (review our Salvage guide here to see more on this). This is vital to ensure you can do necessary repairs but it will also take some
The key is catching issues early and deciding whether a component needs repair by monitoring its health. You can restore components that are completely destroyed back to a functional state while in flight, but you won’t be able to bring them back to full health. To reach 100 percent, they need to be serviced or replaced at a station. If a component is destroyed again after being repaired in flight, it cannot be repaired on the ship a second time and will stay inoperable until you dock. You can carry spare components onboard if you have space, but only size 1 and size 2 components can be swapped while in flight. Anything larger requires you to be in a hangar to replace.
Overall, ensuring you have a capable engineering team that can repair quickly and efficiently, always monitoring the components will set you and your crew above the rest.
Star_Citizen_Patch_45_repair_4k_crop ENGINEERING AVAILABILITY IN ALL VEHICLES
As of Alpha 4.8, every single vehicle in Star Citizen is Engineering-enabled and capable of the baseline experience. While many have the full loop available to them, others remain in ongoing stages of development.
Below is a list of all currently flyable ships and vehicles and their Engineering status for Alpha 4.8. Please remember this list will change with each subsequent patch.
We are tremendously excited by the potential this system has for the future of Star Citizen gameplay, and as each ship continues it's journey to the final stage of implementation, so too will Engineering itself continue to evolve and develop over the next year.
We encourage you to try the experience in multiple ships, and to provide feedback on this new gameplay system through our various communications channels and help us continue to make Engineering as fun and rewarding as possible.
Stage 3 - Fully Enabled All Physicalized Components are Accessible
Full Item Repair Enabled via Physical Access, Engineering Screen or MFDs (Depending on Vehicle Size and Interior)
All Relays are Accessible
Alpha 4.8:
Aegis Gladius
Aegis Gladius Pirate
Aegis Gladius Valiant
Aegis Hammerhead
Aegis Idris-M
Aegis Idris-P
Aegis Retaliator
Aegis Sabre
Aegis Sabre Comet
Aegis Sabre Firebird
Aegis Sabre Peregrine
Aegis Sabre Raven
Aegis Tiburon
Aegis Vanguard Harbinger
Aegis Vanguard Hoplite
Aegis Vanguard Sentinel
Aegis Vanguard Warden
Anvil Asgard
Anvil Carrack
Anvil Paladin
Anvil Terrapin
Anvil Terrapin Medic
Argo CSV-SM
Argo MOLE
Argo MOTH
Argo MPUV-1T
Argo RAFT
Argo SRV
Aopoa San'tok.yai
CNOU Hoverquad
CNOU Nomad
Crusader Ares Inferno
Crusader Ares Ion
Crusader Intrepid
Crusader Mercury Star Runner
Crusader Spirit A1
Crusader Spirit C1
Crusader Starlifter A2
Crusader Starlifter C2
Crusader Starlifter M2
Drake Clipper
Drake Corsair
Drake Cutter
Drake Cutter Rambler
Drake Cutter Scout
Drake Golem
Drake Golem OX
Drake Ironclad
Drake Ironclad Assault
Drake Pitbull
Drake Vulture
Esperia Prowler
Esperia Prowler Utility
Esperia Talon
Esperia Talon Shrike
Gatac Syulen
Greycat MDC
Greycat MTC
Greycat STV
Greycat UTV
Kruger L-21 Wolf
Kruger L-22 Alpha Wolf
MISC Fortune
MISC Freelancer
MISC Freelancer DUR
MISC Freelancer MAX
MISC Freelancer MIS
MISC Hull B
MISC Starlancer MAX
MISC Starlancer TAC
MSIC Starlite
Mirai Fury
Mirai Fury LX
Mirai Fury MX
Mirai Guardian
Mirai Guardian MX
Mirai Guardian QI
Mirai Pulse
Mirai Pulse LX
Origin M80
Origin X1
Origin X1 Force
Origin X1 Velocity
RSI Apollo Medivac
RSI Apollo Triage
RSI Aurora Mk I CL
RSI Aurora Mk I ES
RSI Aurora Mk I LN
RSI Aurora Mk I LX
RSI Aurora Mk I MR
RSI Aurora Mk I SE
RSI Aurora Mk II
RSI Hermes
RSI Lynx
RSI Mantis
RSI Meteor
RSI Perseus
RSI Polaris
RSI Salvation
RSI Scorpius
RSI Scorpius Antares
RSI Ursa Medivac
RSI Zeus CL
RSI Zeus ES
Tumbril Nova
Tumbril Storm
Tumbril Storm AA
Stage 2 - Partial Functionality Some Physicalized Components are Accessible, but Not Potentially Not All
Some Item Repair Enabled via Physical Access, Engineering Screen or MFDs (Depending on Vehicle Size and Interior)
Some Relays are Accessible Depending on Vehicle
Alpha 4.8:
Aegis Reclaimer
Aegis Redeemer
Anvil Centurion
Anvil Spartan
Anvil Valkyrie
Anvil Valkyrie Liberator
Drake Caterpillar
Drake Cutlass Black
Drake Cutlass Blue
Drake Cutlass Red
Drake Cutlass Steel
Esperia Stinger
Grey's Market Shiv
MISC Hull-A
MISC Hull-C
MISC Starfarer
MISC Starfarer Gemini
Origin 100i
Origin 125a
Origin 135c
Origin 400i
Origin 600i Explorer
Origin 600i Touring
Origin 890J
RSI Constellation Andromeda
RSI Constellation Aquila
RSI Constellation Phoenix
RSI Constellation Taurus
Stage 1 - Basic Support No Physicalized Components are Accessible
Item Repair Enabled Only via MFDs
No Relays are Accessible
Alpha 4.8:
Aegis Avenger Stalker
Aegis Avenger Titan
Aegis Avenger Warlock
Aegis Eclipse
Anvil Arrow
Anvil Ballista
Anvil Gladiator
Anvil Hawk
Anvil Hornet F7A Mk1
Anvil Hornet F7A Mk2
Anvil Hornet F7C Mk1
Anvil Hornet F7C Mk2
Anvil Hornet F7C Wildfire Mk1
Anvil Hornet F7CM Mk1
Anvil Hornet F7CM Mk2
Anvil Hornet F7CR Mk1
Anvil Hornet F7CR Mk2
Anvil Hornet F7CS Mk1
Anvil Hornet F7CS Mk2
Anvil Hurricane
Anvil Lightning F8C
Anvil Pisces C8/C8X
Anvil Pisces C8R
Aopoa Khartu-Al
Aopoa Nox
Argo MPUV-1C
Argo MPUV-1P
Banu Defender
CNOU Mustang Alpha
CNOU Mustang Alpha Vindicator
CNOU Mustang Beta
CNOU Mustang Delta
CNOU Mustang Gamma
CNOU Mustang Omega
Drake Buccaneer
Drake Dragonfly
Drake Herald
Esperia Blade
Esperia Glaive
Greycat PTV
Greycat ROC
Greycat ROC-DS
Kruger Archimedes
Kruger Merlin
MISC Prospector
MISC Razor
MISC Razor EX
MISC Razor LX
MISC Relian Sen
MISC Reliant Kore
MISC Reliant Mako
MISC Reliant Tana
Origin 300i
Origin 315p
Origin 325a
Origin 350r
Origin 85X
Origin M50
RSI Ursa
Tumbril Cyclone
Tumbril Cyclone AA
Tumbril Cyclone MT
Tumbril Cyclone RC
Tumbril Cyclone RN
Tumbril Cyclone TR
Vanduul Scythe
Links
No links available.
Images
83
)/star-citizen-patch-tools-45-1-finalfinal-1.webp)
)/star-citizen-patch-tools-45-1-finalfinal-2.webp)
)/star-citizen-patch-tools-45-1-finalfinal-3.webp)
)/star-citizen-patch-tools-45-1-finalfinal-4.webp)
)/star-citizen-patch-tools-45-1-finalfinal-5.webp)
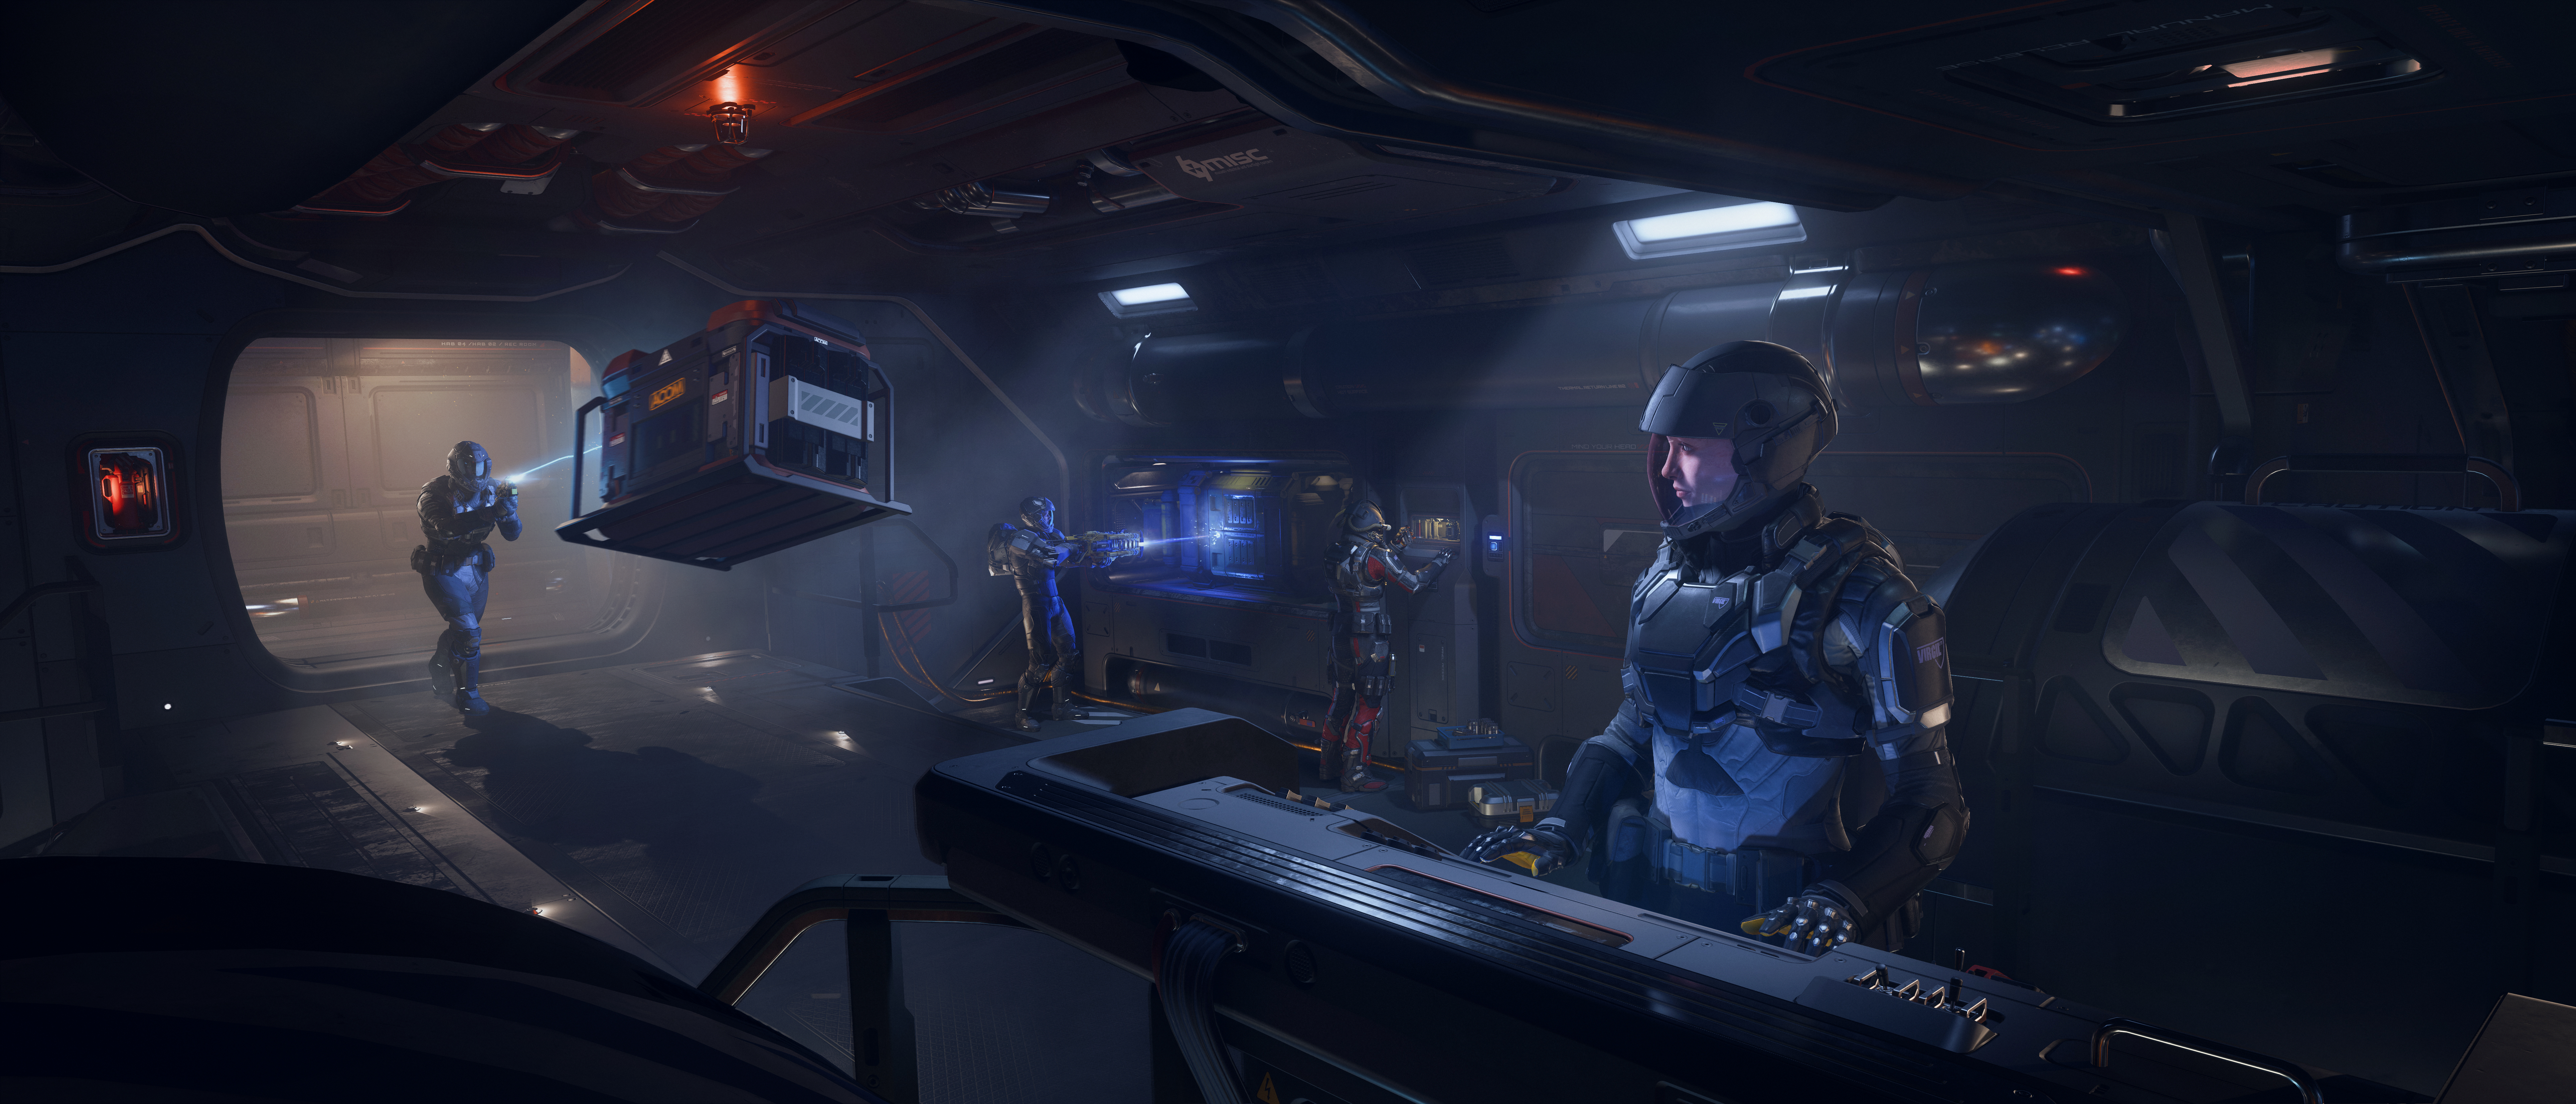
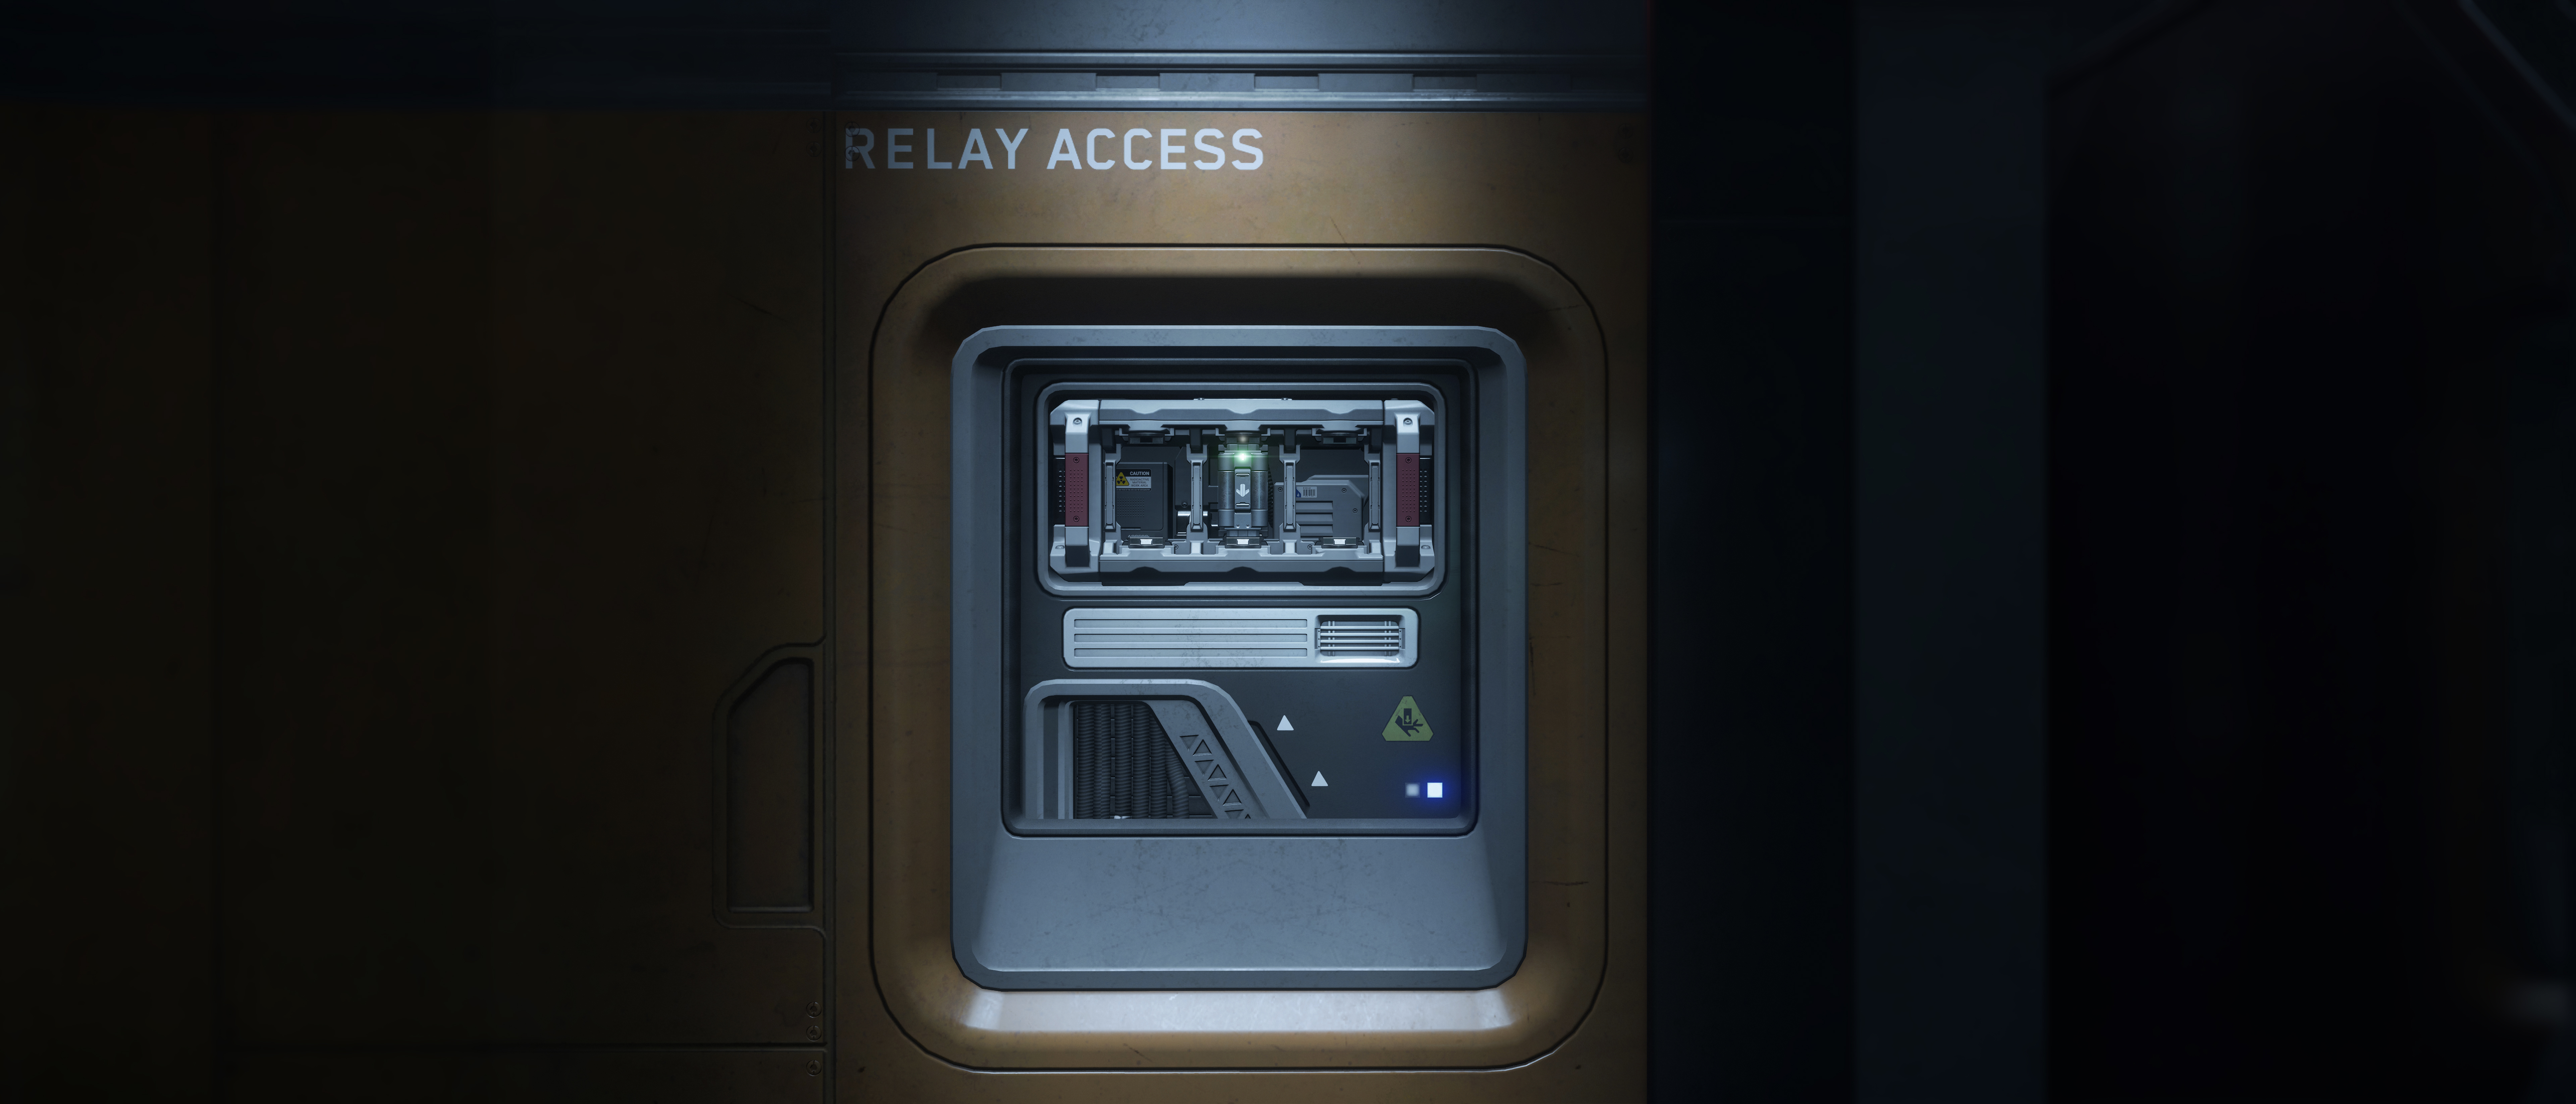
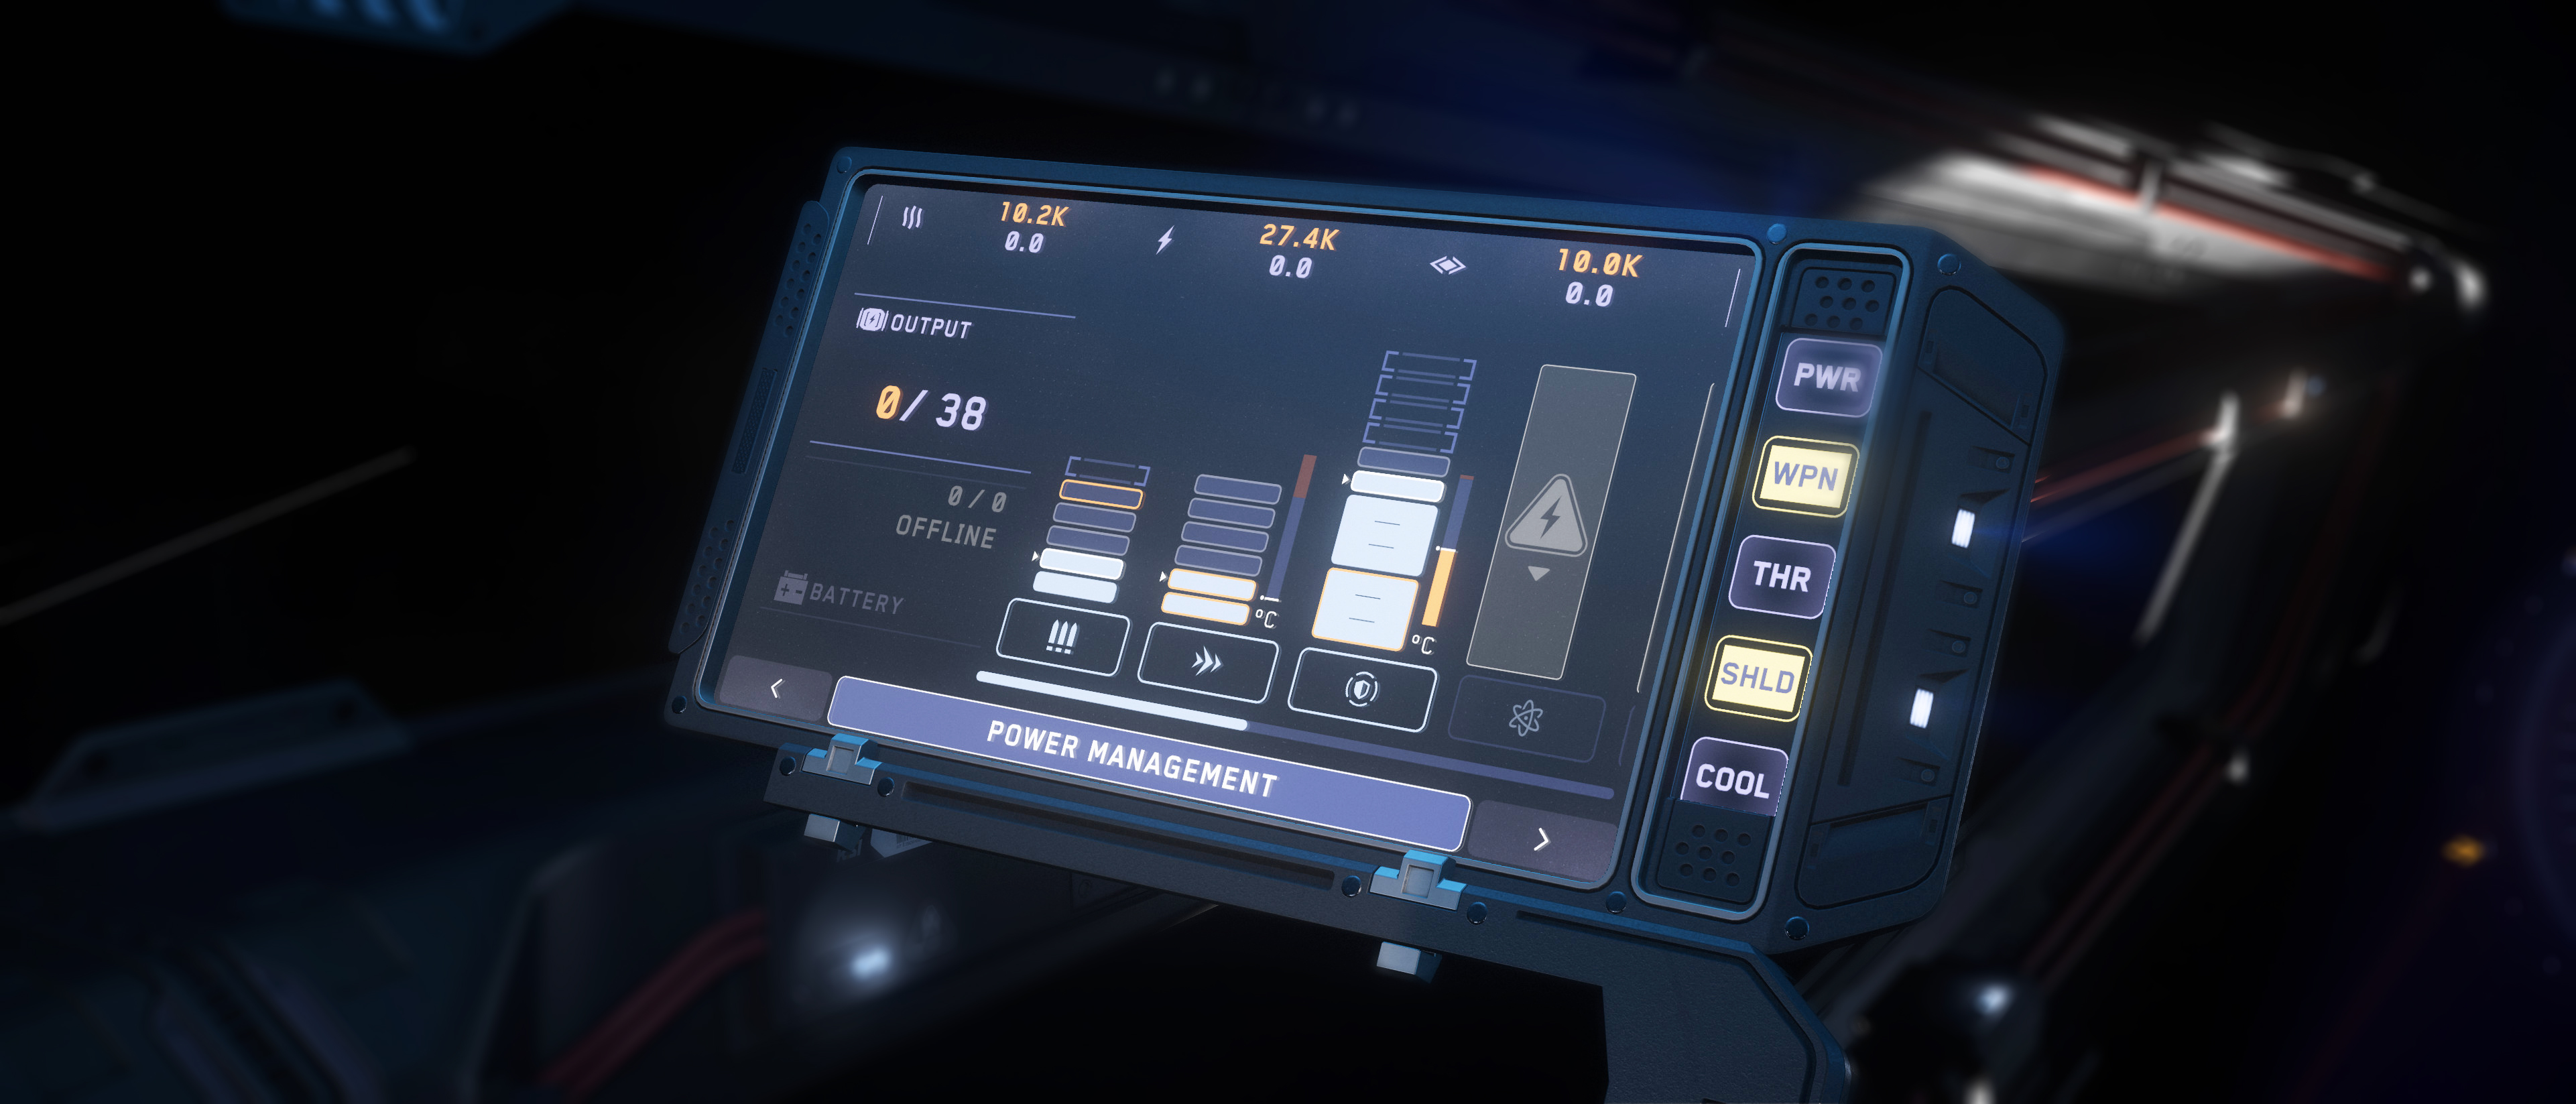
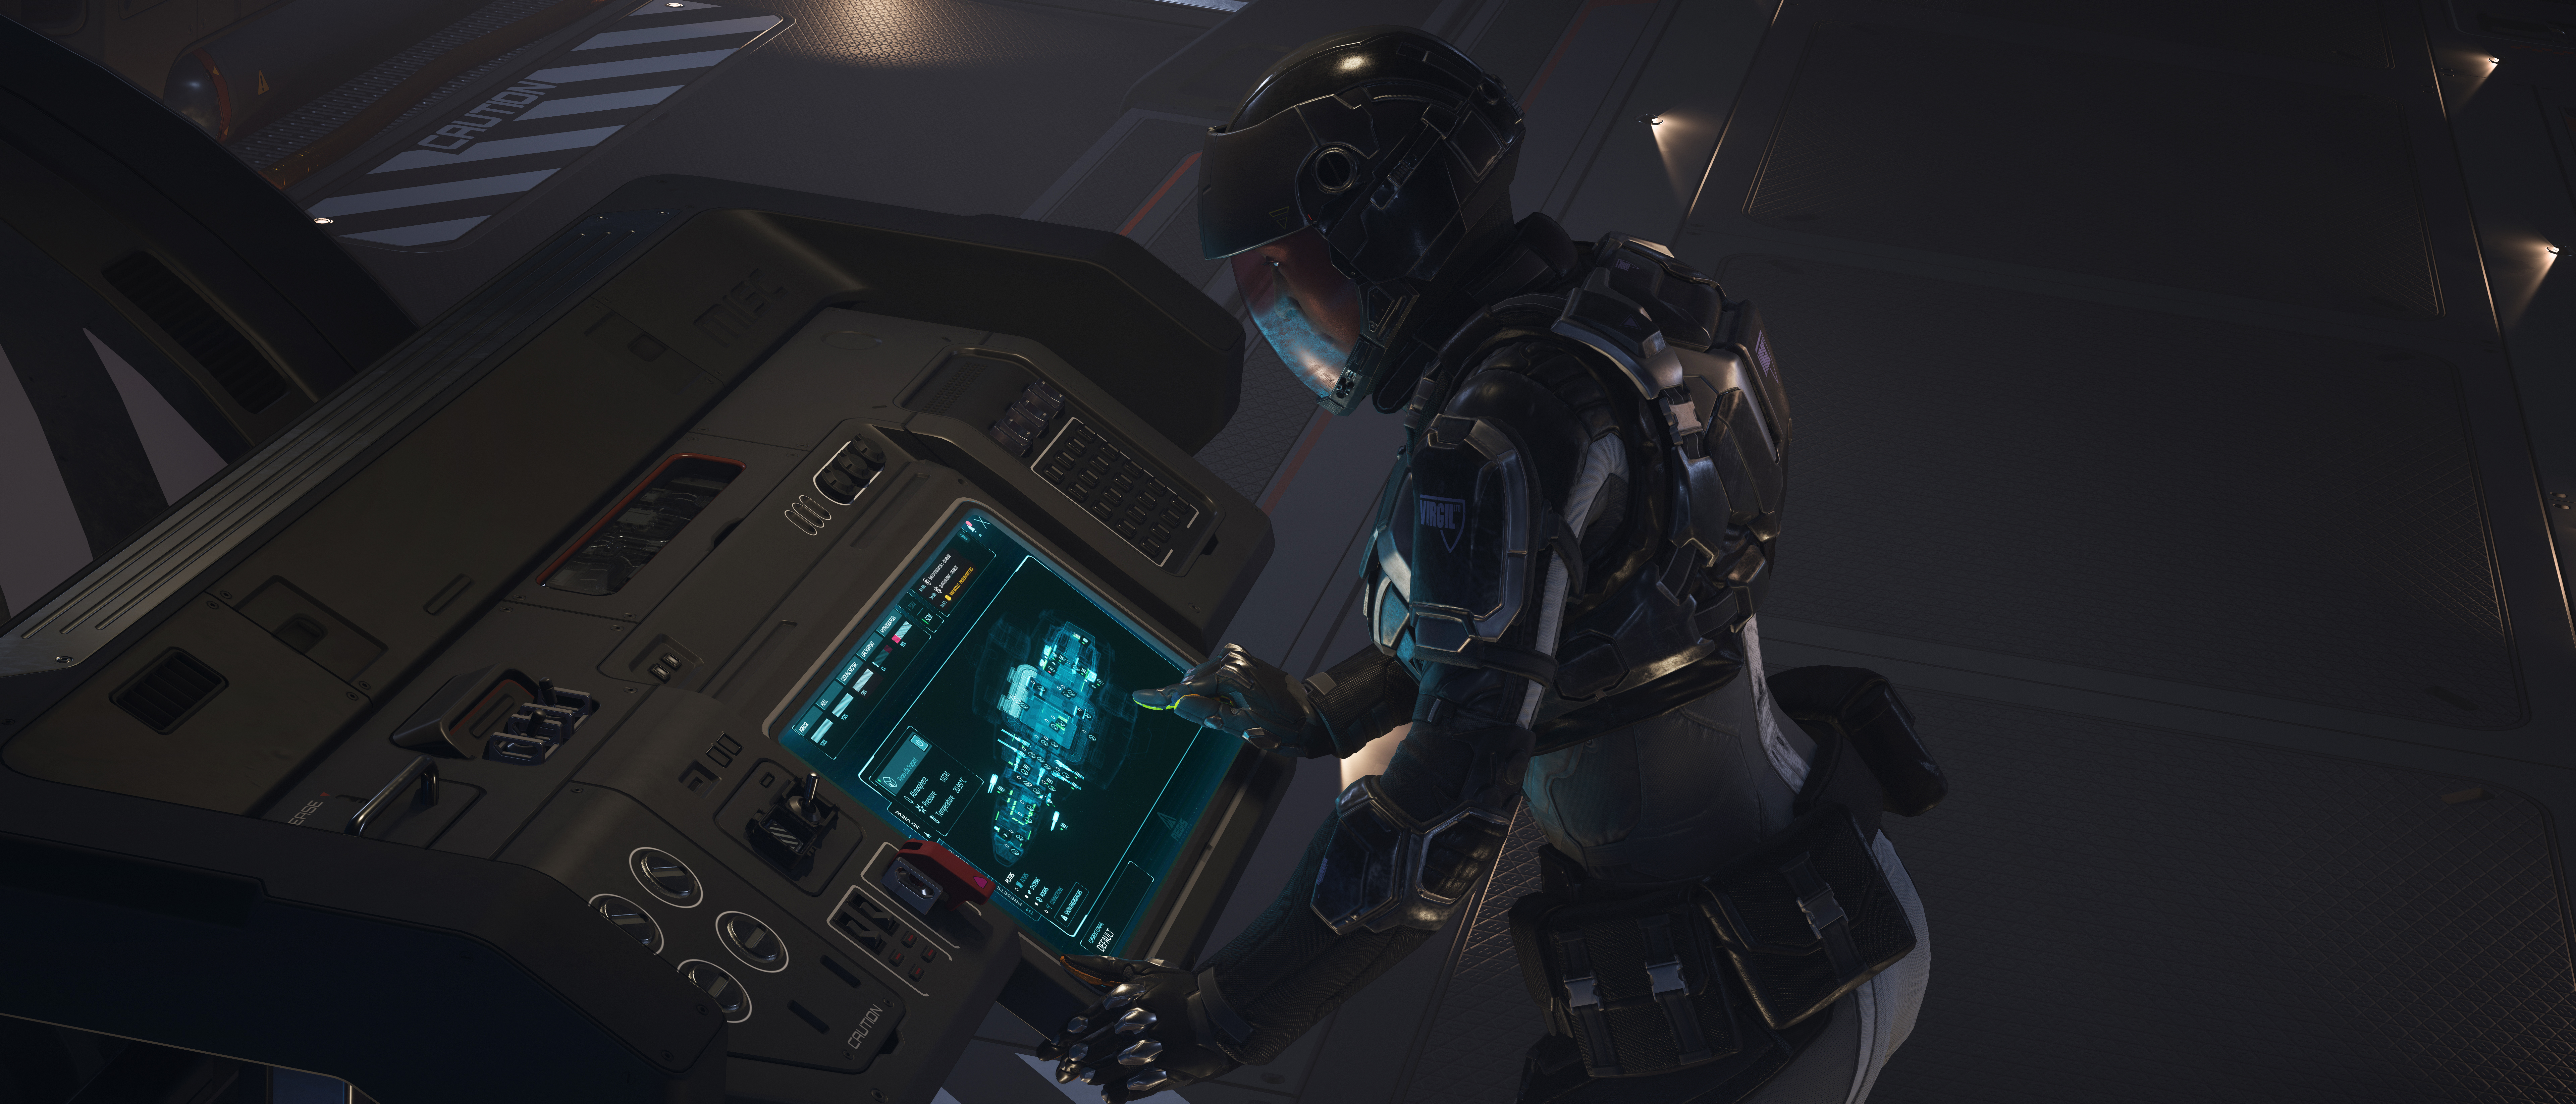
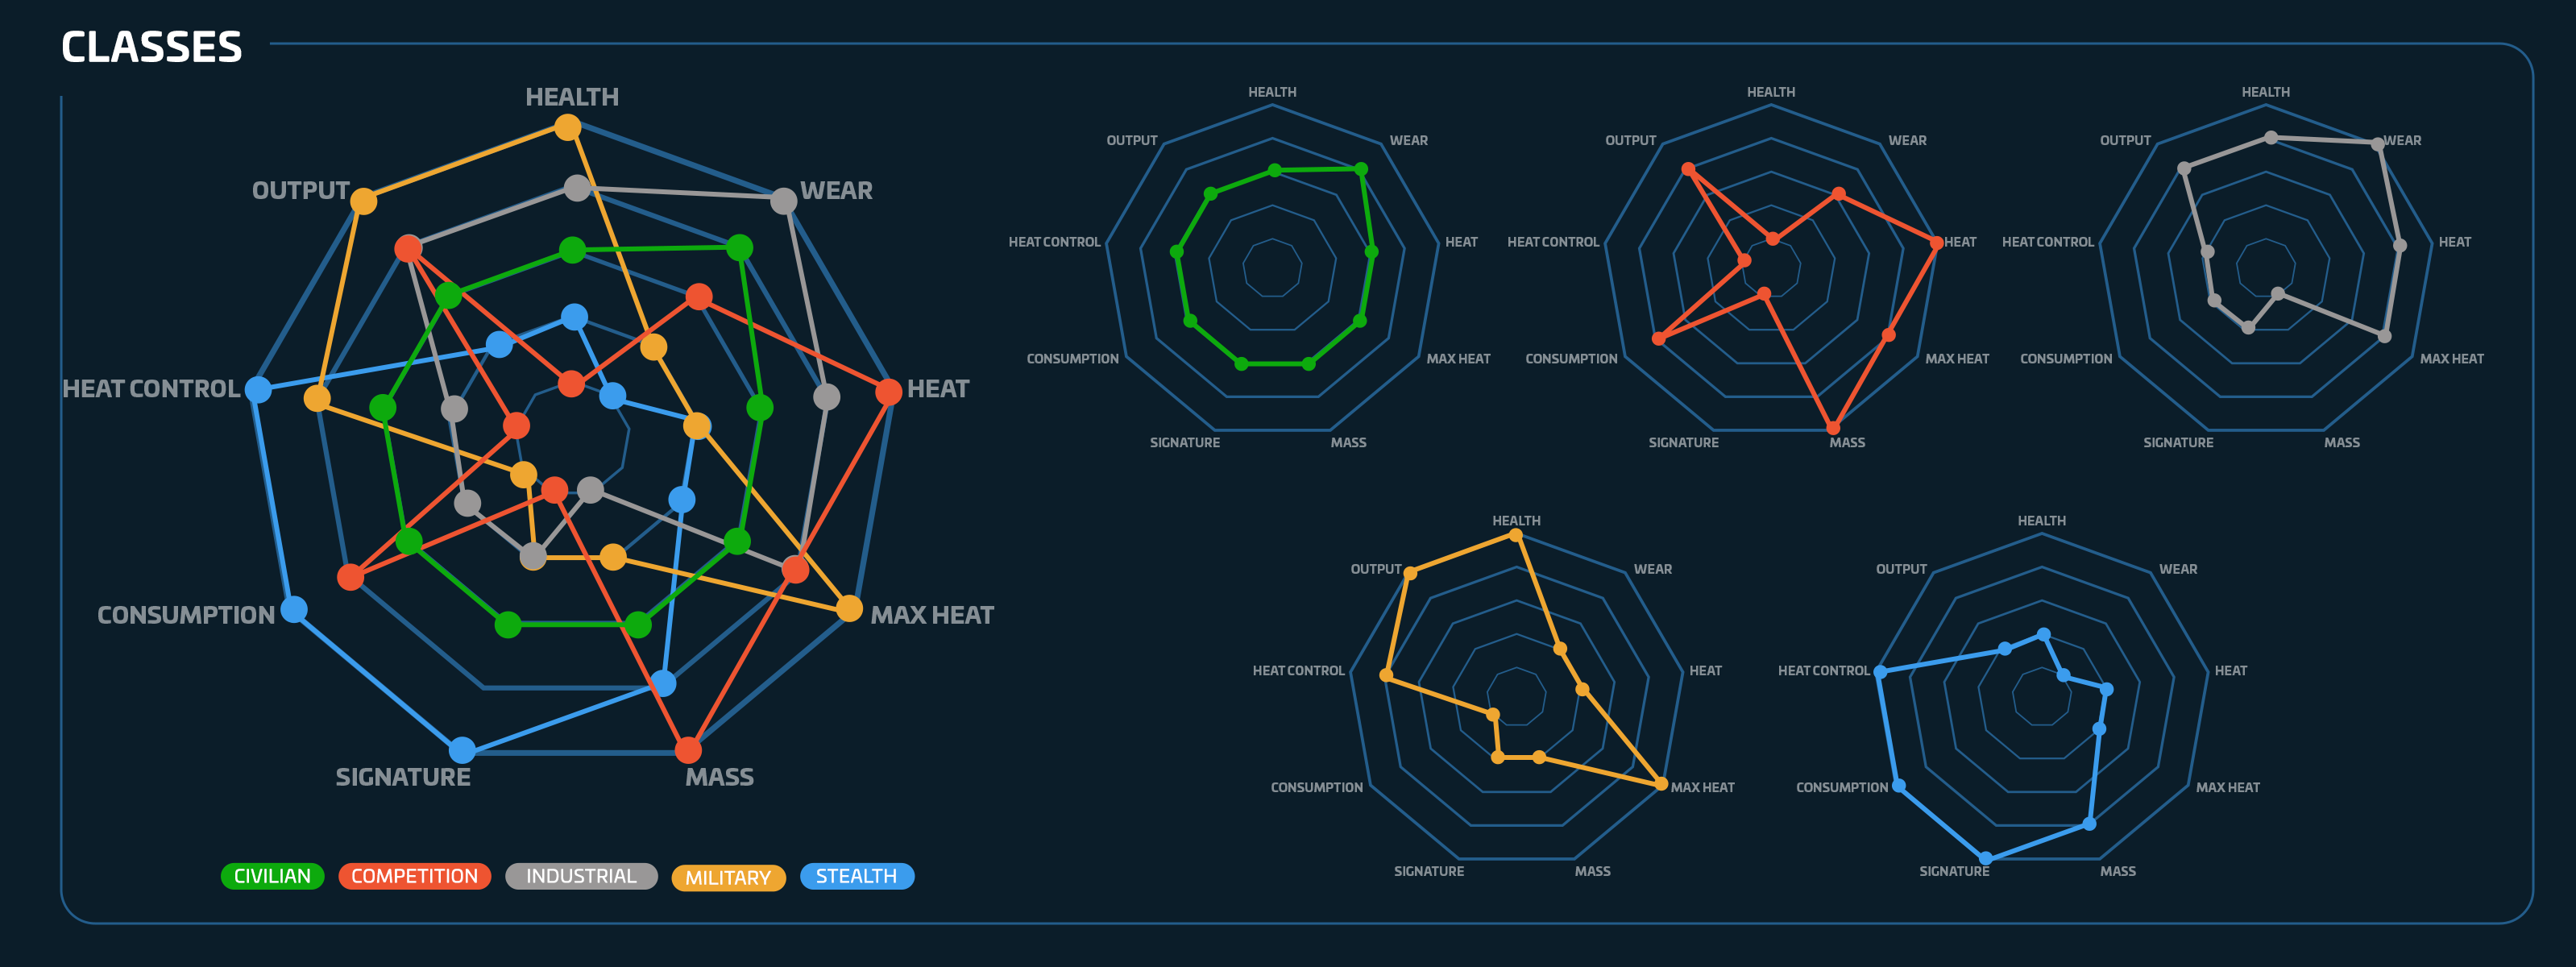
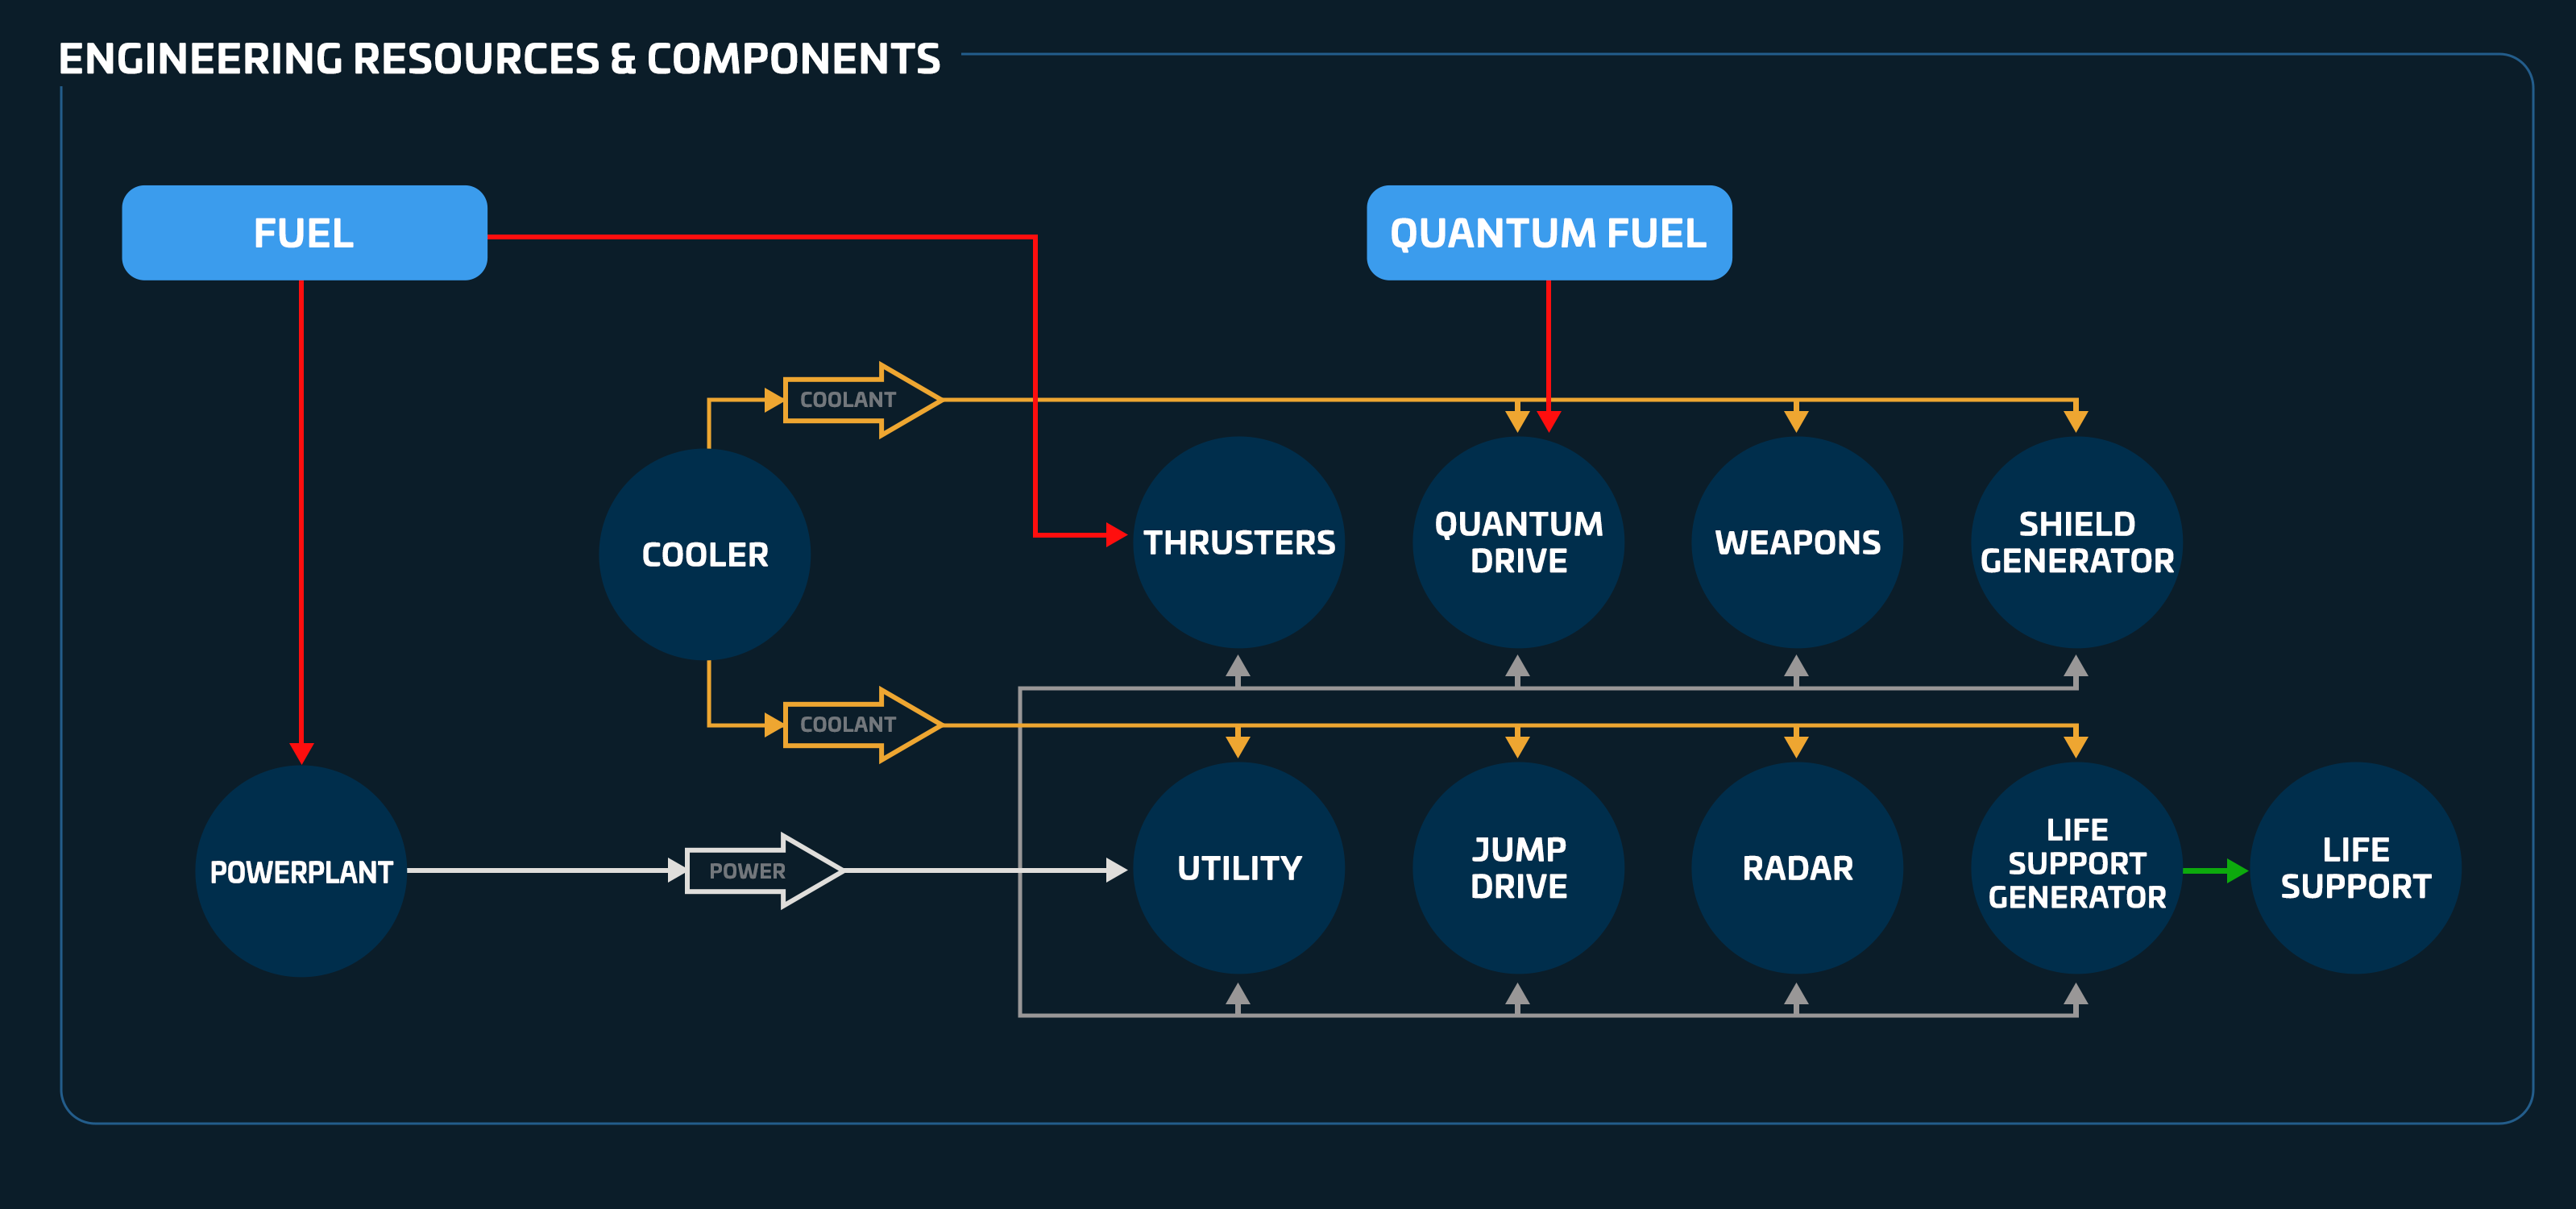
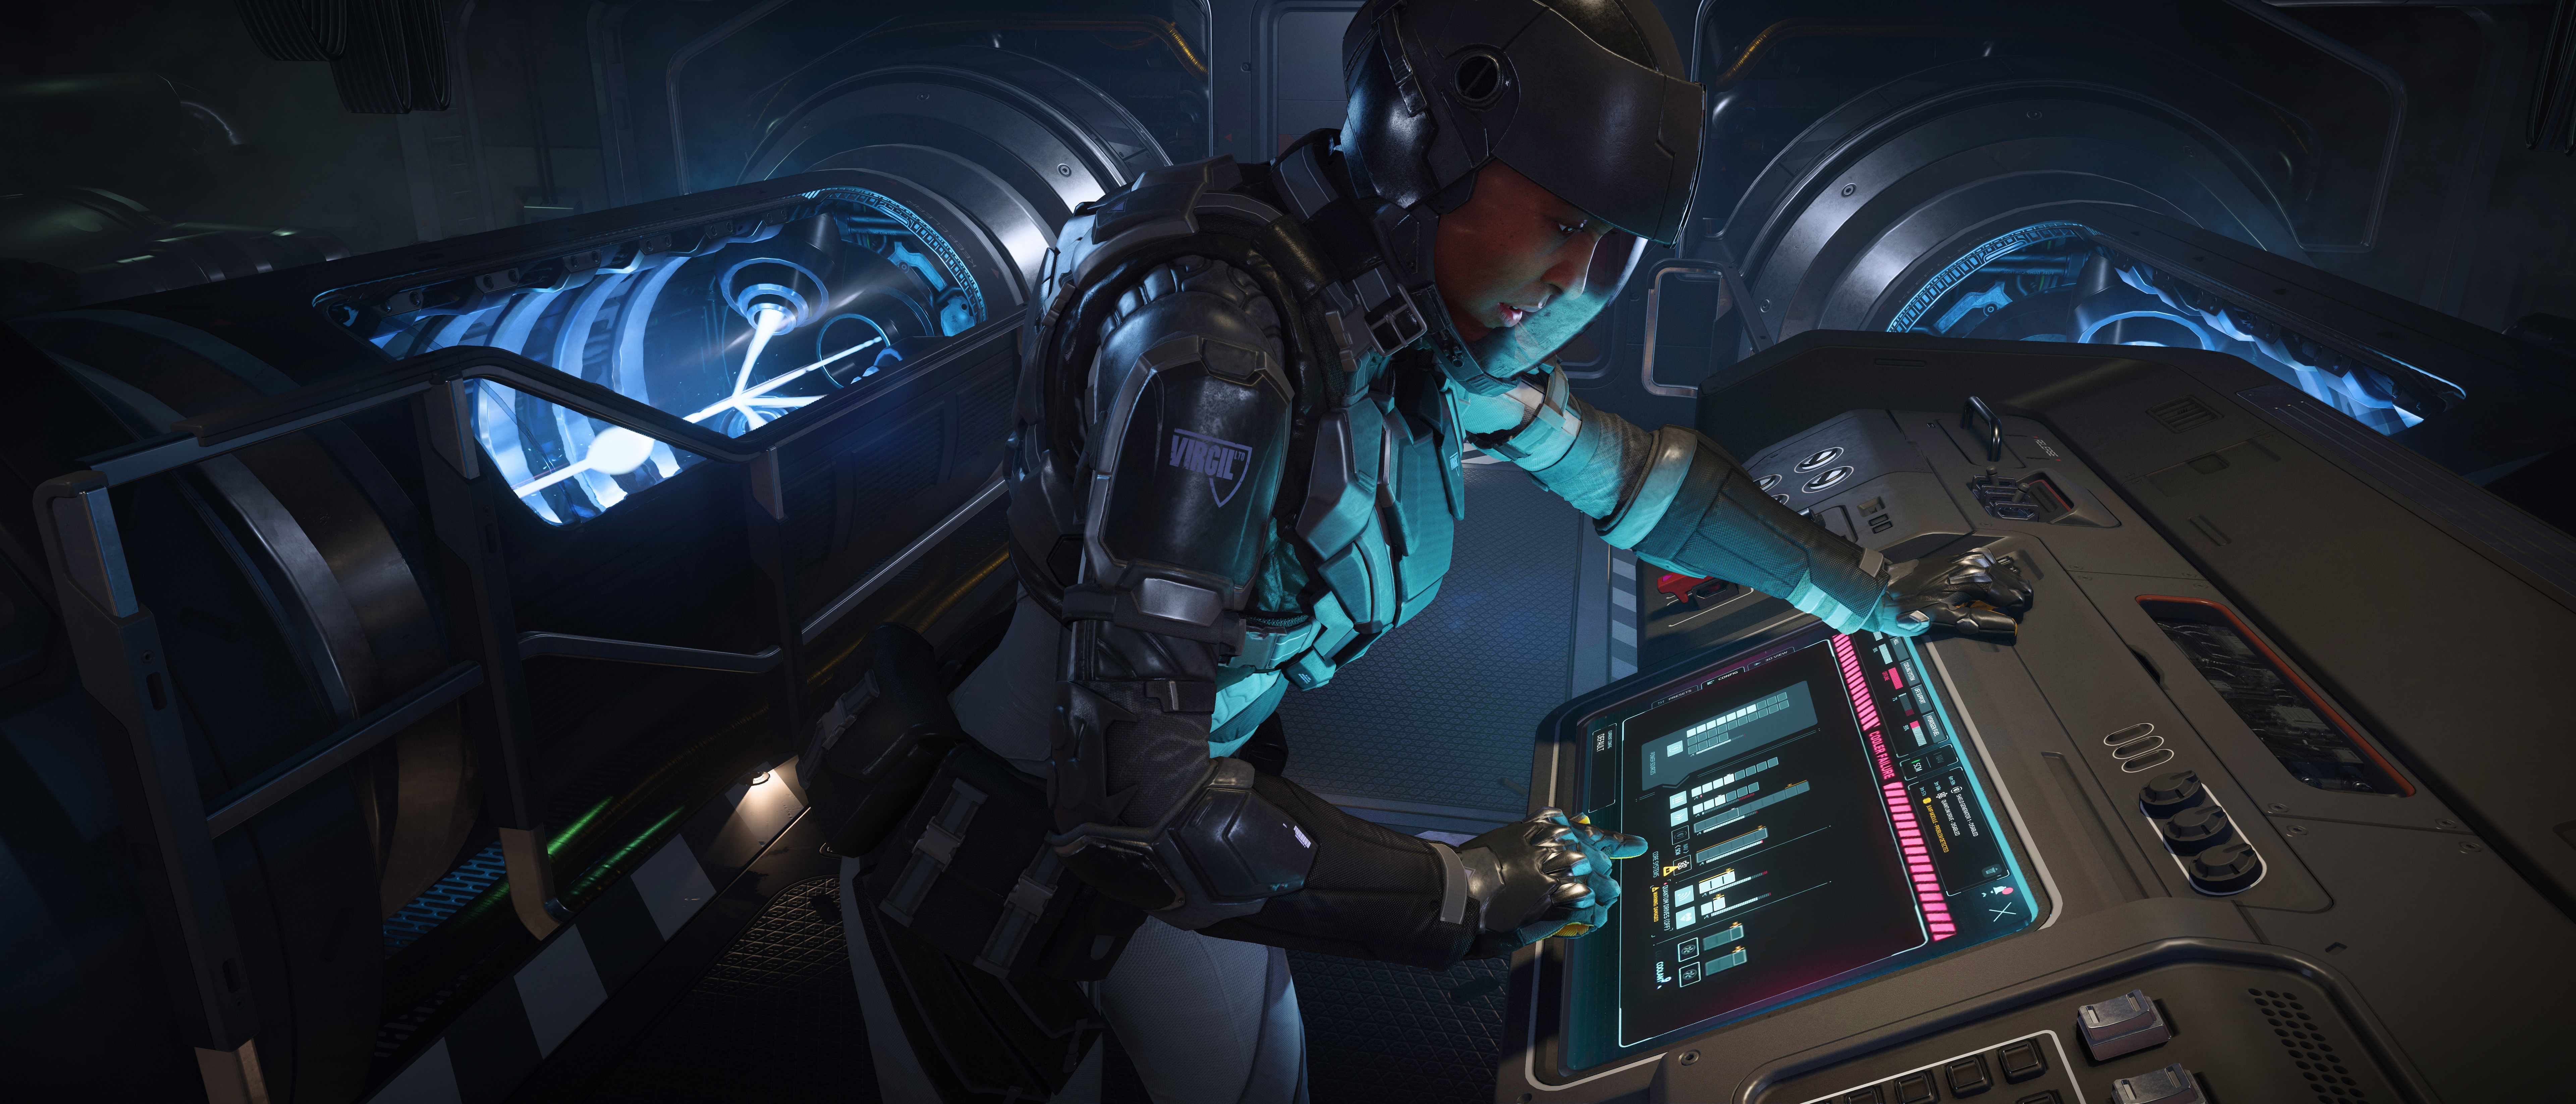
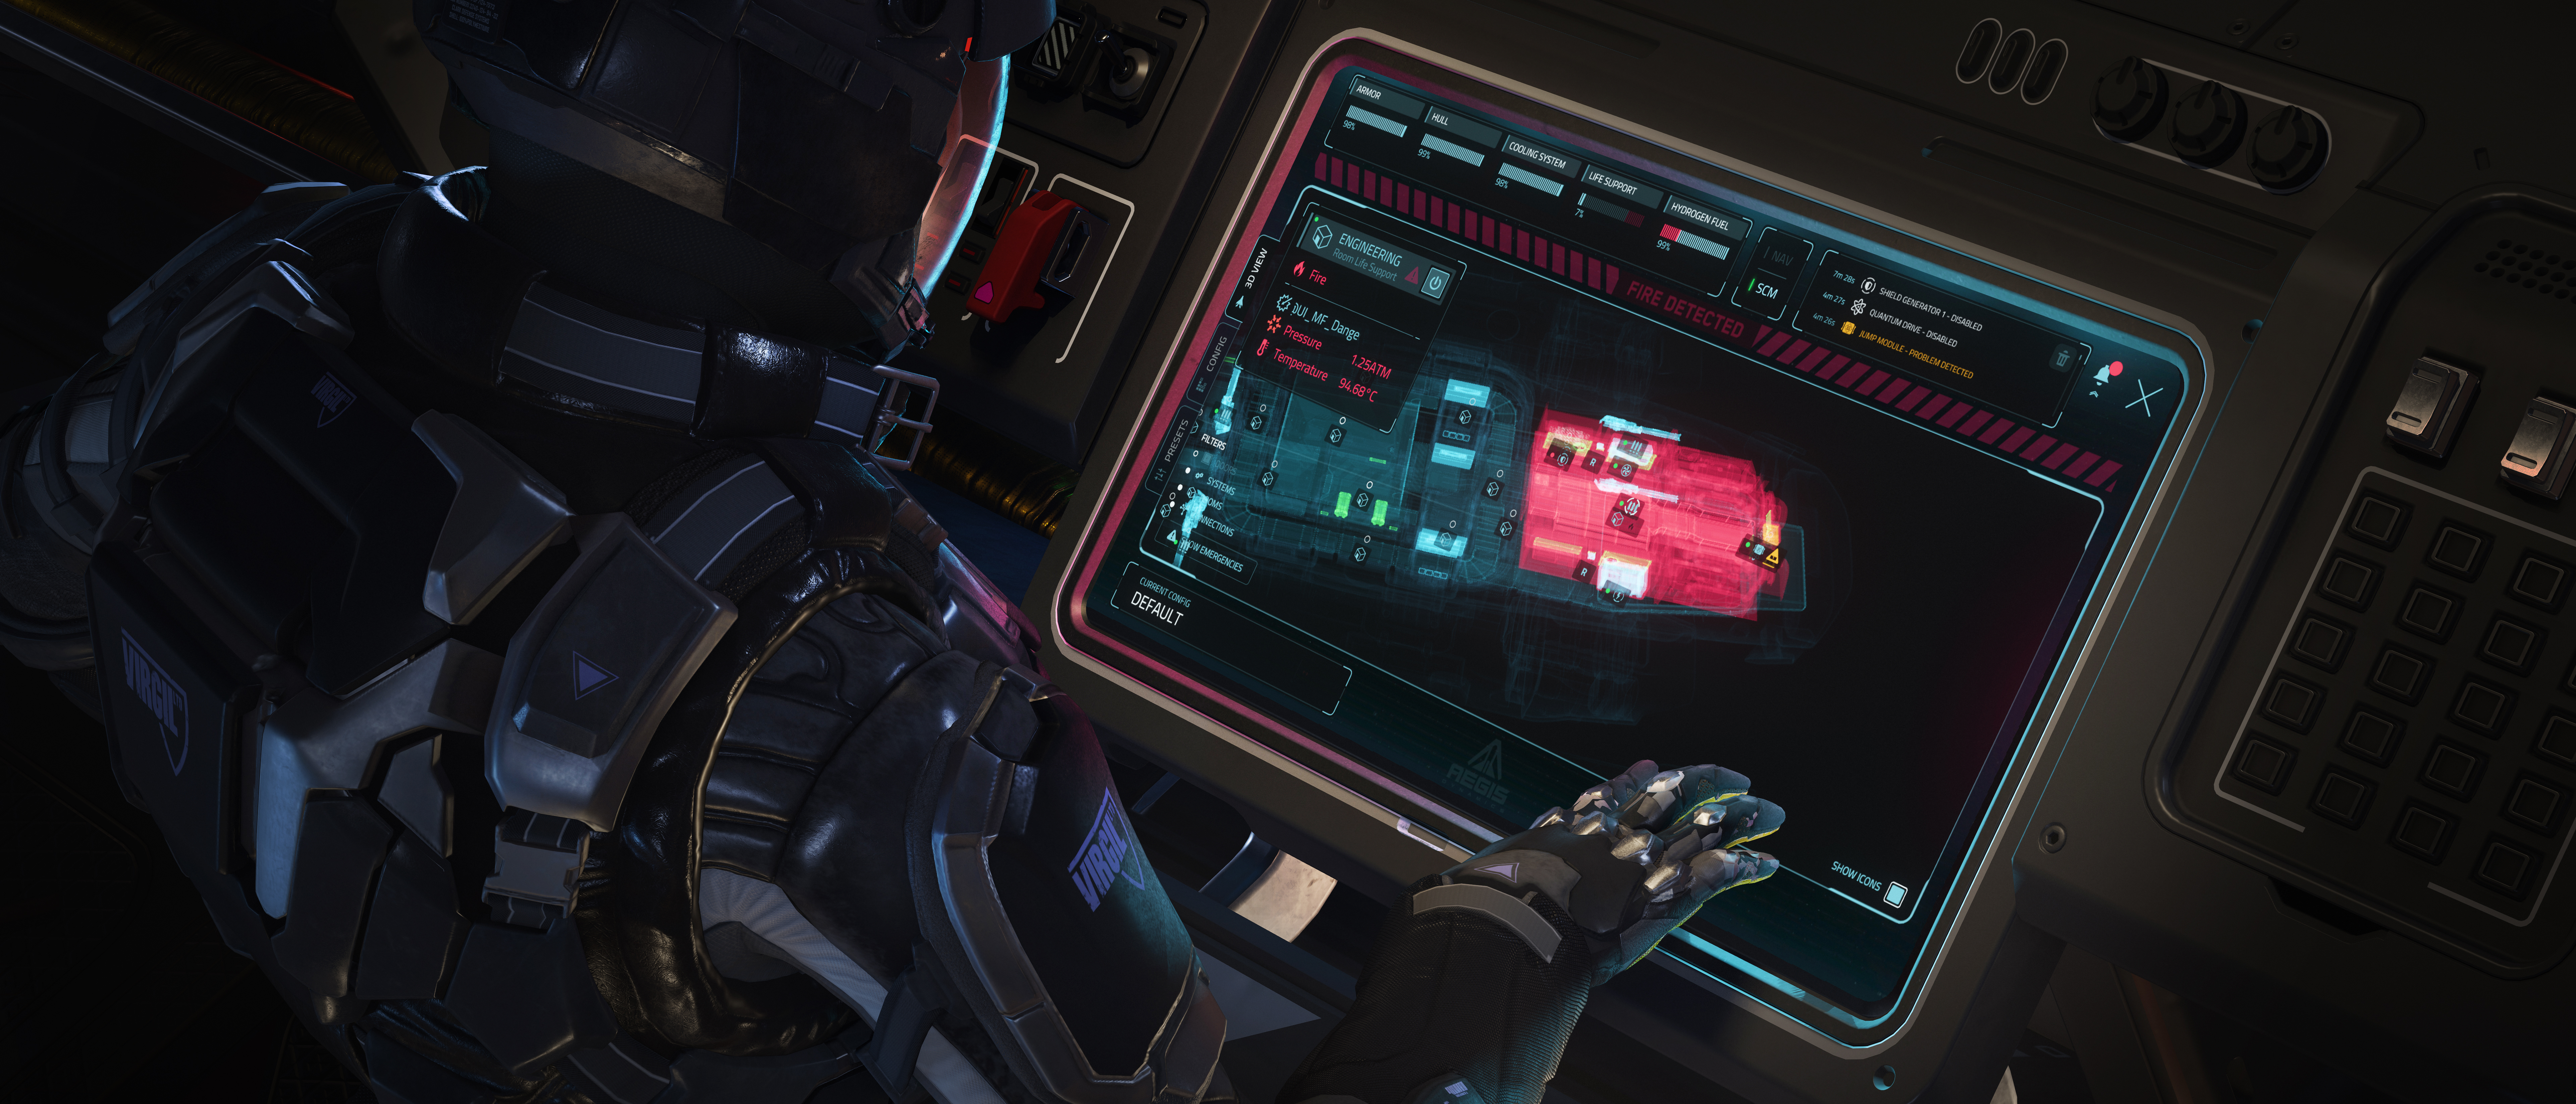
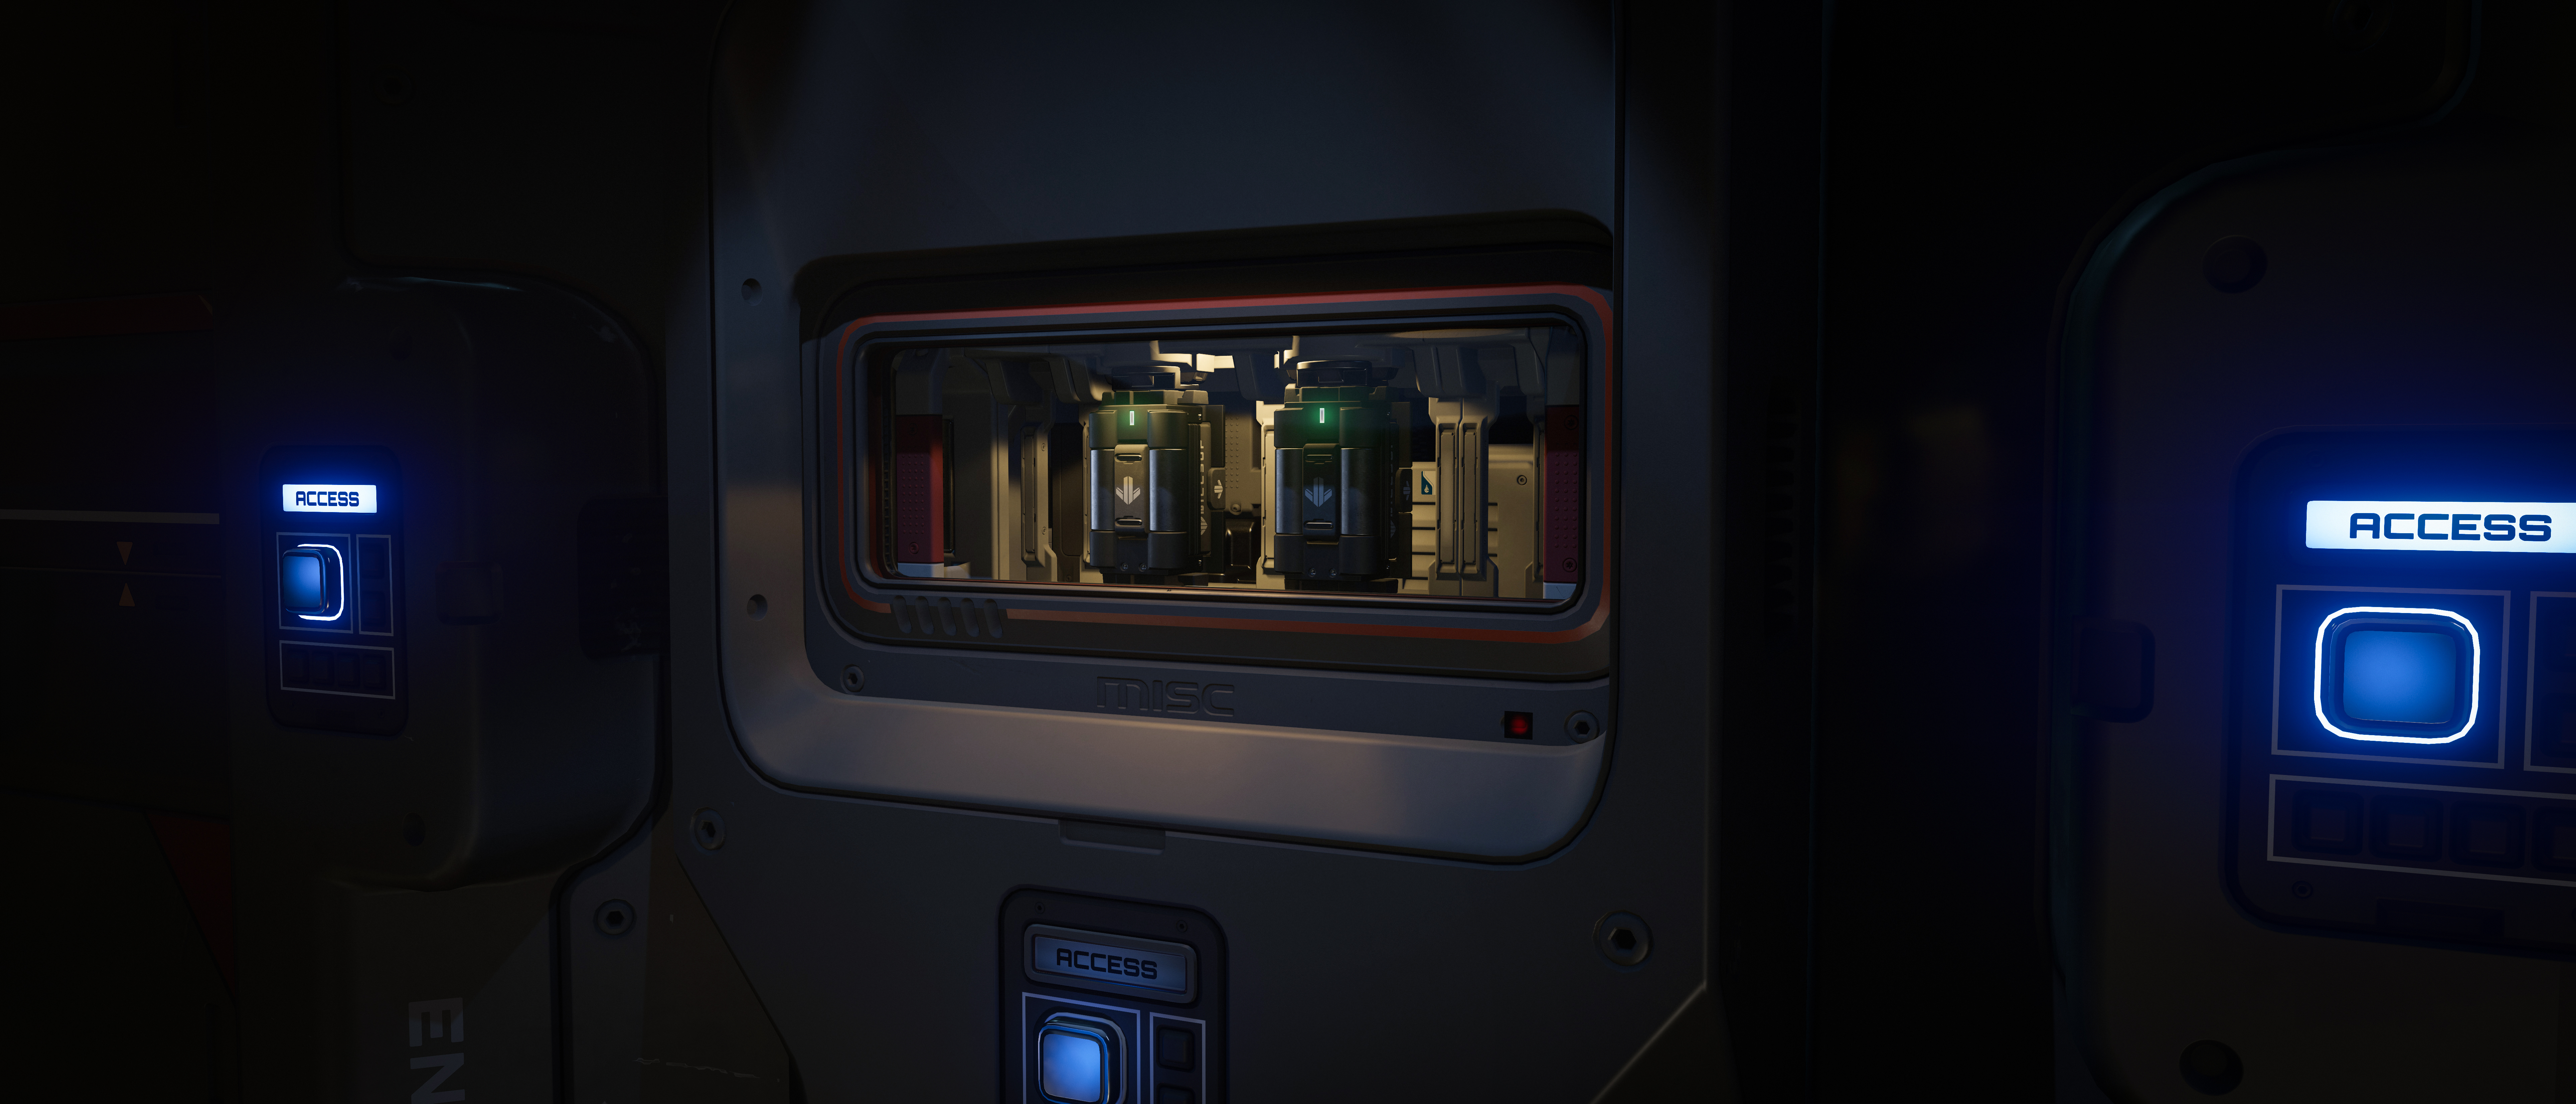
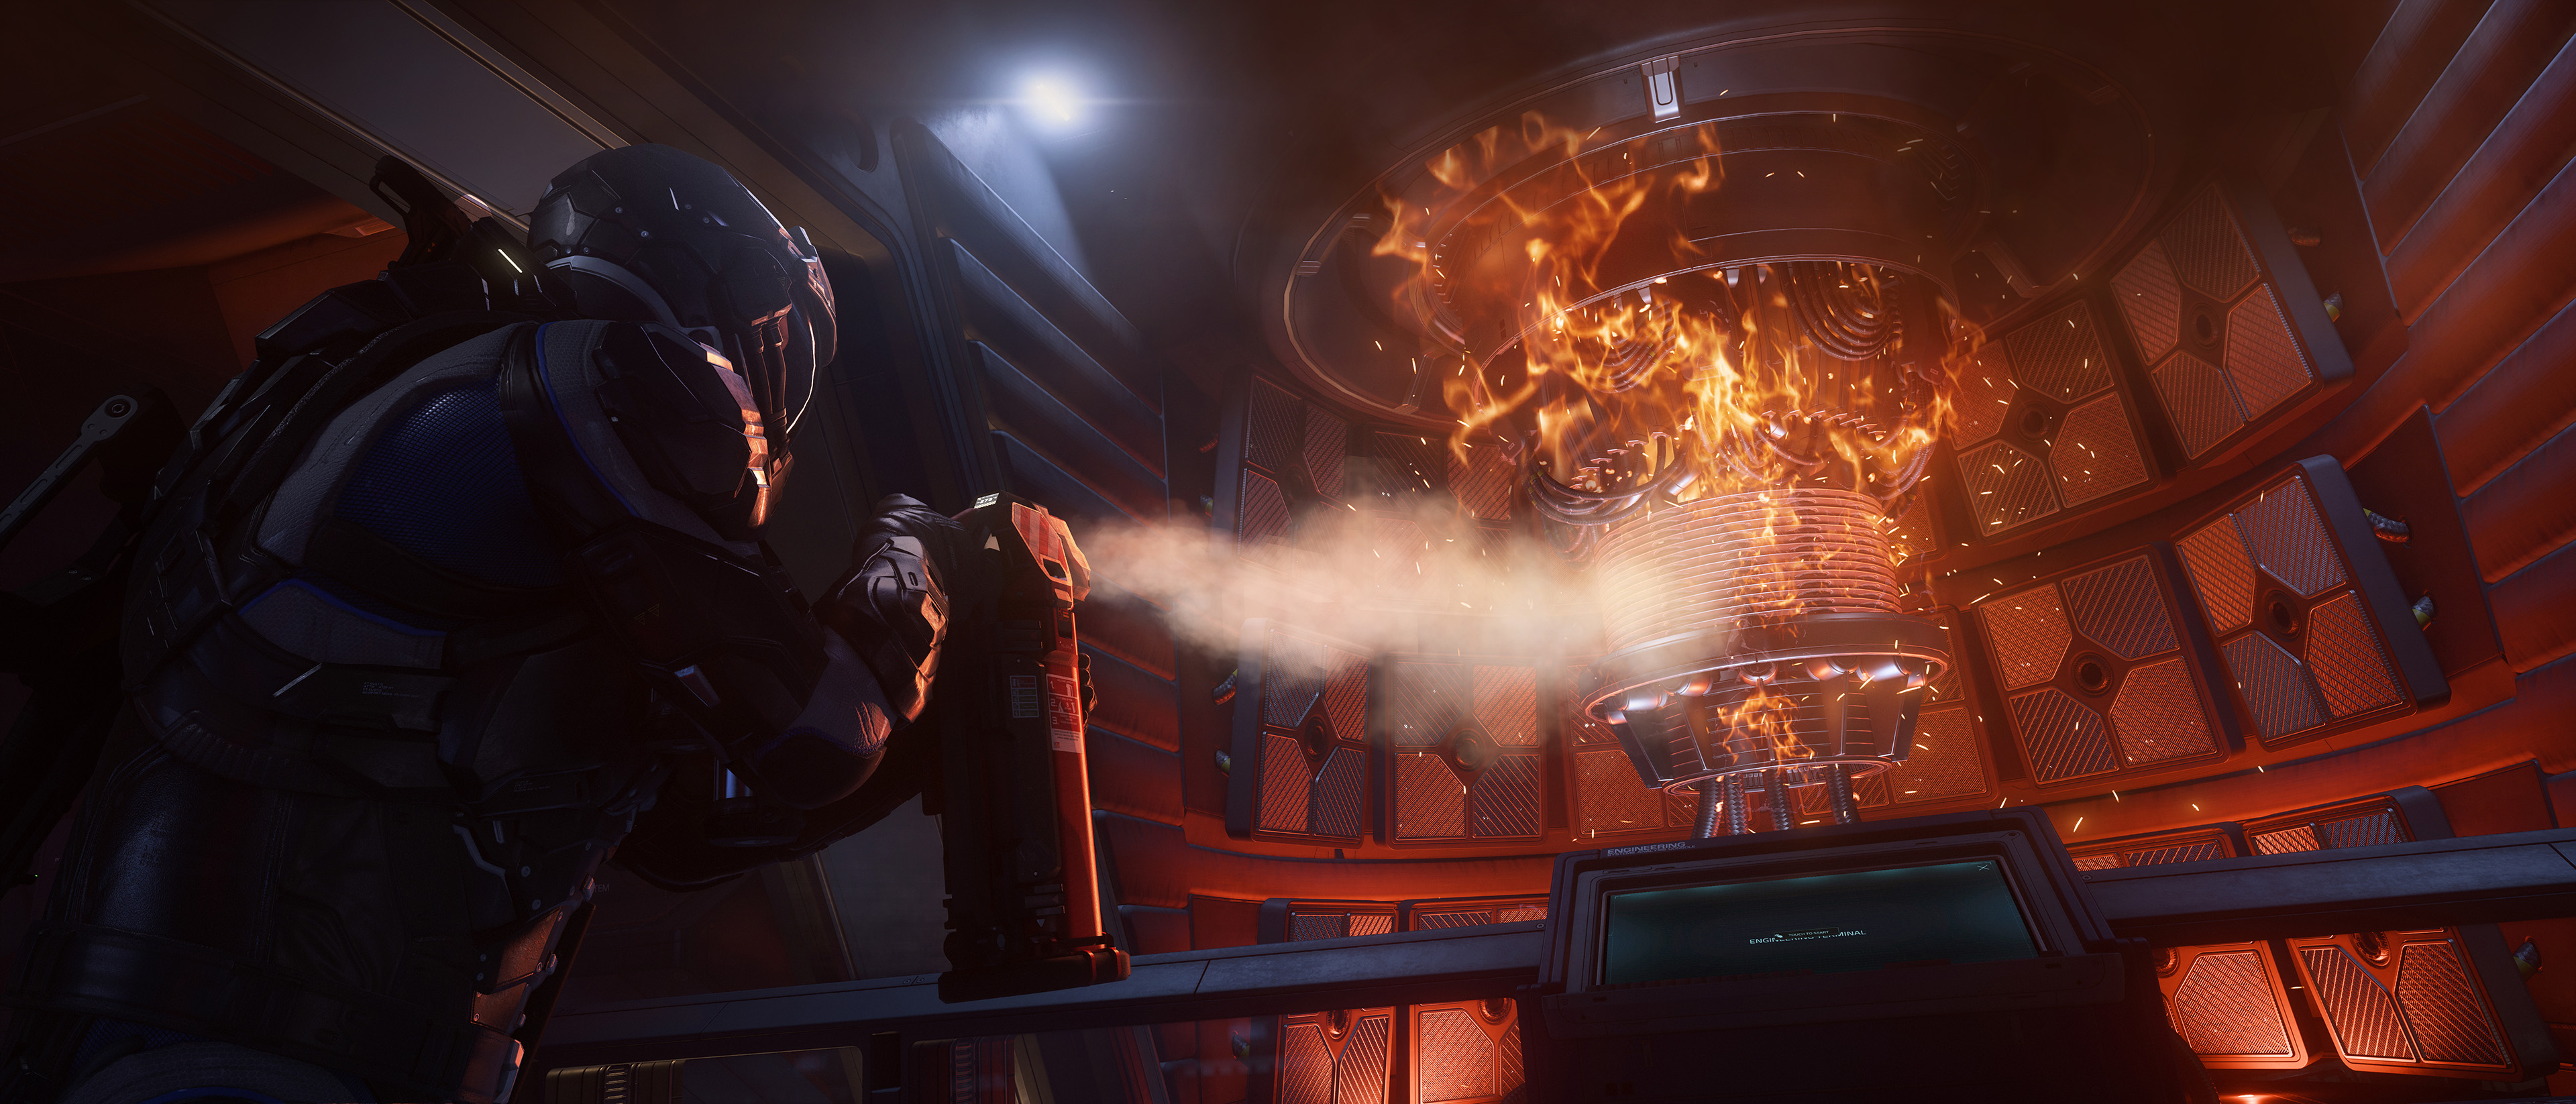
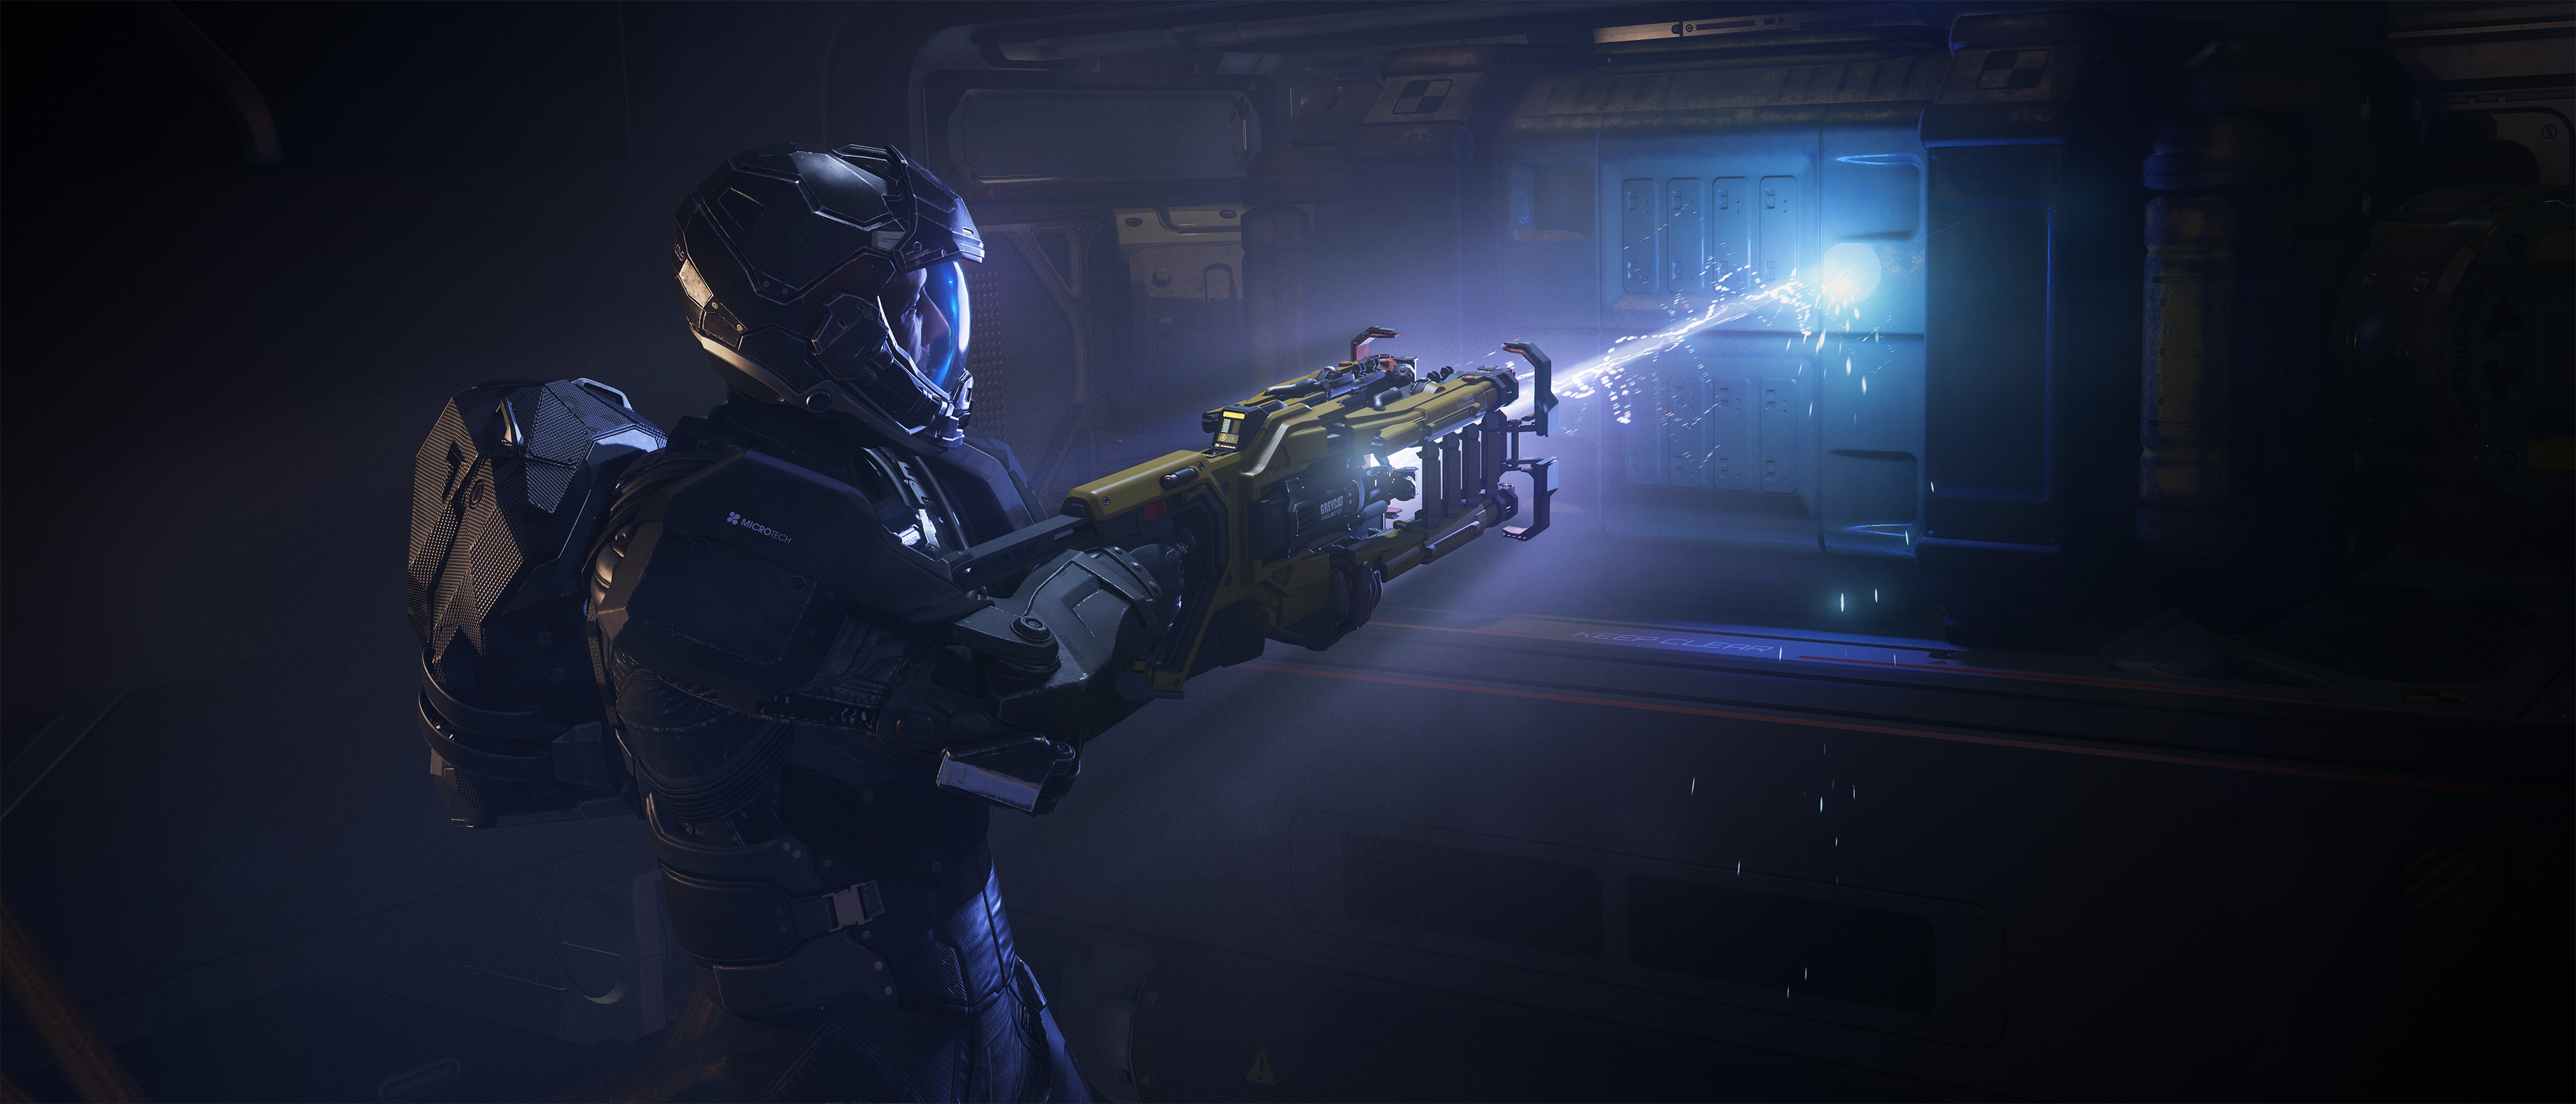
star-citizen-patch-4-5-engineering-guide-banner-ps.webp
interior-2-1.webp
star-citizen-patch-tools-45-1-finalfinal-1.png
star-citizen-patch-tools-45-1-finalfinal-1.webp
star-citizen-patch-tools-45-1-finalfinal-2.png
star-citizen-patch-tools-45-1-finalfinal-2.webp
star-citizen-patch-tools-45-1-finalfinal-3.png
star-citizen-patch-tools-45-1-finalfinal-3.webp
star-citizen-patch-tools-45-1-finalfinal-4.png
star-citizen-patch-tools-45-1-finalfinal-4.webp
star-citizen-patch-tools-45-1-finalfinal-5.png
star-citizen-patch-tools-45-1-finalfinal-5.webp
Star_Citizen_Patch_4-5_Engineering_Guide_Banner_PS.jpg
star-citizen-patch-4-5-engineering-guide-banner-ps.jpg
Star_Citizen_45_Patch_Relay_Image.jpg
star-citizen-45-patch-relay-image.jpg
star-citizen-45-patch-relay-image.webp
star-citizen-45-patch-relay-image.jpg
Star_Citizen_45_MFD_Power_Distribution_ZEUS_ScreenOnly.jpg
star-citizen-45-mfd-power-distribution-zeus-screenonly.jpg
star-citizen-45-mfd-power-distribution-zeus-screenonly.webp
star-citizen-45-mfd-power-distribution-zeus-screenonly.jpg
Use_Console_Screen_Shot_03_Screen_Update.jpg
use-console-screen-shot-03-screen-update.jpg
use-console-screen-shot-03-screen-update.webp
use-console-screen-shot-03-screen-update.jpg
Engineering-Classes.png
engineering-classes.png
engineering-classes.webp
engineering-classes.png
ResourceAndComponentFlow.png
resourceandcomponentflow.png
resourceandcomponentflow.webp
resourceandcomponentflow.png
Use_Console_Screen_Shot_01_ScreenUpdate2.jpg
use-console-screen-shot-01-screenupdate2.jpg
use-console-screen-shot-01-screenupdate2.webp
use-console-screen-shot-01-screenupdate2.jpg
Use_Console_Screen_Shot_02_ScreenUpdate.jpg
use-console-screen-shot-02-screenupdate.jpg
use-console-screen-shot-02-screenupdate.webp
use-console-screen-shot-02-screenupdate.jpg
Star_Citizen_Patch_45_fuse_box.jpg
star-citizen-patch-45-fuse-box.jpg
star-citizen-patch-45-fuse-box.webp
star-citizen-patch-45-fuse-box.jpg
Hammerhead_4K_16_9.png
Hammerhead_4K_16_9.png
hammerhead-4k-16-9.png
hammerhead-4k-16-9.webp
hammerhead-4k-16-9.png
Star_Citizen_FIRE.jpg
star-citizen-fire.jpg
star-citizen-fire.webp
star-citizen-fire.jpg
Star_Citizen_Patch_45_repair_4k_crop.jpg
star-citizen-patch-45-repair-4k-crop.webp
star-citizen-patch-45-repair-4k-crop.jpg
Metadata
- CIG ID
- 20935
- Channel
- Transmission
- Category
- Undefined
- Series
- None
- Comments
- 0
- Published
- 4 months ago (2026-05-25T10:00:00+00:00)